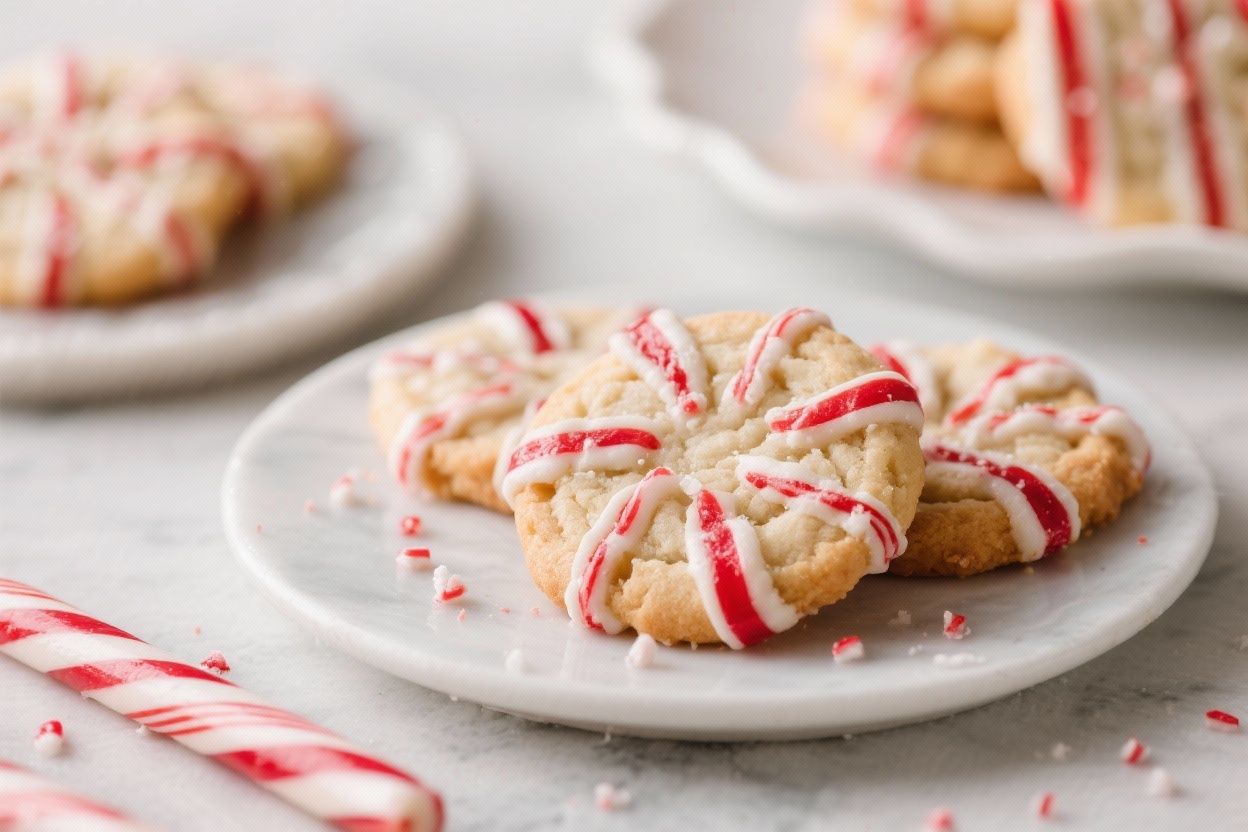
Candy cane cookies are the kind of treat that instantly sets a cozy holiday mood. They’re buttery, minty, and shaped like cute little canes that look straight out of a storybook. Kids love twisting the colors together, and adults love the nostalgic flavor.
These cookies are soft with a delicate crumb, and they hold their shape beautifully. If you’re looking for a cheerful baking project that’s simple and reliable, this recipe is your new favorite.
What Makes This Recipe So Good

These cookies strike the perfect balance between sweetness and peppermint. The dough is easy to handle and doesn’t crumble or crack when shaping.
You’ll get a tender, shortbread-like texture with a hint of vanilla and almond that complements the mint without overpowering it. The red-and-white twist looks festive on any cookie tray, and the recipe is forgiving even if you’re new to shaping dough. Best of all, the cookies bake up evenly and keep their definition, so every batch looks picture-perfect.
Shopping List
- Unsalted butter (room temperature) – 1 cup (2 sticks)
- Granulated sugar – 1 cup
- Large egg – 1
- Vanilla extract – 1 teaspoon
- Almond extract – 1/2 teaspoon (optional but recommended)
- Peppermint extract – 1/2 teaspoon
- All-purpose flour – 3 cups
- Baking powder – 1 teaspoon
- Salt – 1/2 teaspoon
- Red gel food coloring – a few drops
- Crushed candy canes or peppermint candies – optional for sprinkling
- Powdered sugar – optional for dusting
How to Make It
- Cream the butter and sugar. In a large bowl, beat the butter and granulated sugar until light and fluffy, about 2–3 minutes.
This step traps air and gives you a tender cookie.
- Add the egg and extracts. Mix in the egg, vanilla, almond (if using), and peppermint extract until smooth. Scrape the bowl to catch any butter on the sides.
- Whisk the dry ingredients. In a separate bowl, whisk the flour, baking powder, and salt. Gradually add the dry mix to the wet ingredients, stirring just until the dough comes together.
- Divide and tint. Split the dough into two equal portions.
Leave one plain. Tint the other with red gel food coloring, kneading gently until evenly colored. Add a tiny bit at a time until you reach a candy-cane red.
- Chill the dough. Wrap each portion in plastic and chill for 30–45 minutes.
Chilled dough is easier to shape and helps cookies hold their form.
- Preheat and prep. Heat the oven to 350°F (175°C). Line baking sheets with parchment paper.
- Shape the ropes. Working with a small piece at a time, roll a teaspoon-sized ball of white dough into a rope about 5–6 inches long. Do the same with the red dough.
Place them side by side, gently press together, and twist to create the classic candy cane spiral.
- Form the hook. Transfer to the baking sheet and curve the top into a cane shape. Leave space between cookies; they won’t spread much but need breathing room.
- Optional sprinkle. If you like a little crunch, lightly sprinkle the surface with finely crushed candy cane pieces before baking.
- Bake. Bake for 8–11 minutes until the edges look set and the bottoms are just turning light golden. The tops should stay pale for the prettiest look.
- Cool. Let cookies rest on the baking sheet for 5 minutes, then move to a wire rack to cool completely.
If you’d like, dust with powdered sugar once cool.
Keeping It Fresh
Store the cookies in an airtight container at room temperature for up to 5 days. To keep them soft, add a slice of bread or a few marshmallows to the container and replace as needed. For longer storage, freeze baked cookies in layers separated by parchment for up to 2 months.
You can also freeze the shaped, unbaked dough and bake straight from frozen, adding 1–2 extra minutes to the bake time.
Benefits of This Recipe
- Festive presentation without fuss: The twist looks impressive, yet the steps are simple.
- Reliable texture: Tender, delicate crumb with just enough structure for shaping.
- Kid-friendly activity: Rolling ropes and twisting colors is hands-on and fun.
- Make-ahead friendly: Dough chills well, freezes well, and bakes up consistently.
- Balanced flavor: Vanilla, almond, and peppermint create a classic holiday taste without overwhelming sweetness.
What Not to Do
- Don’t skip chilling. Warm dough loses its shape and gets sticky, making twisting frustrating.
- Don’t overbake. These cookies should stay pale on top. Too much browning leads to dryness and a crumbly texture.
- Don’t use liquid food coloring. Gel coloring keeps the dough from getting wet and helps the color stay bright.
- Don’t add too much peppermint extract. A heavy hand turns the cookies harsh and medicinal. Measure carefully.
- Don’t roll the ropes too thick. Thick ropes won’t bake evenly and can lose the candy cane definition.
Alternatives
- Flavor swaps: Replace peppermint extract with orange or lemon extract for a citrus twist.
Skip peppermint entirely for a pure vanilla-almond cookie.
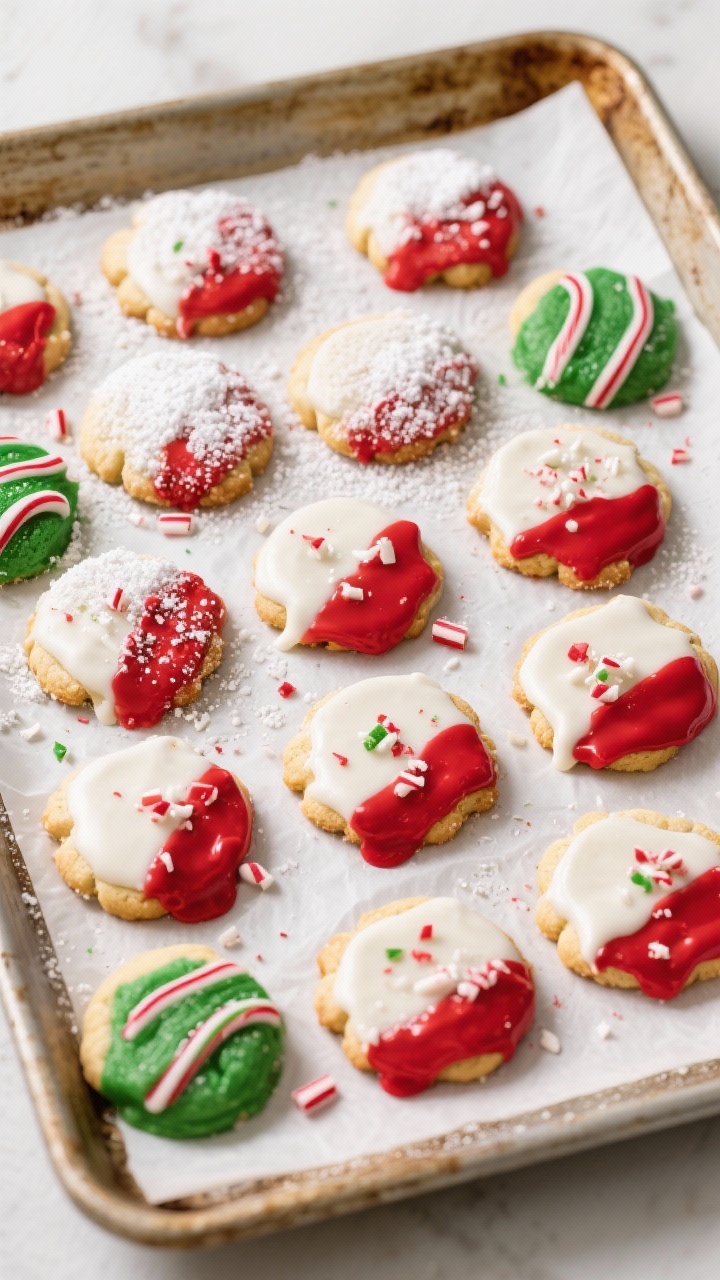
- Color options: Use green gel coloring instead of red, or try a red-and-green combo for a colorful cookie tray.
- Gluten-free: Use a 1:1 gluten-free baking flour with xanthan gum. Chill a bit longer to help the dough firm up before shaping.
- Dairy-free: Swap butter with a plant-based stick butter (not a tub). Choose one with at least 75–80% fat for best texture.
- Coatings: Roll the shaped canes lightly in sanding sugar before baking for sparkle without extra sweetness.
- Chocolate finish: Dip cooled cookies halfway into melted white chocolate and sprinkle with crushed candy canes for a fancy finish.
FAQ
Why did my dough crack when I tried to twist it?
Your dough was likely too cold or too dry.
Let it sit at room temperature for 5–10 minutes to soften slightly, and knead gently to smooth it out. If needed, rub a tiny bit of butter on your hands to add suppleness while rolling.
How do I keep the red color from bleeding into the white?
Use gel food coloring and mix it thoroughly into the red dough before shaping. Chill both dough colors, and avoid overhandling once you start twisting.
Bake as soon as they’re shaped to limit color transfer.
Can I make the dough ahead of time?
Yes. The dough can be chilled for up to 3 days or frozen for up to 2 months. If frozen, thaw overnight in the fridge, then let it warm slightly until workable before shaping.
What if I don’t like peppermint?
Skip the peppermint and increase vanilla to 1 1/2 teaspoons, with 1/2 teaspoon almond extract.
You’ll get a classic buttery cookie with a subtle almond aroma.
How big should I make each cookie?
Roll ropes to about 5–6 inches long and roughly pencil-thick. Smaller cookies bake more evenly and hold their cane shape better than oversized ones.
Do these cookies spread?
Not much. As long as the dough is chilled and the ropes aren’t too thick, the cookies keep their definition.
Parchment-lined sheets help prevent extra spreading.
Can I double the recipe?
Absolutely. Double all ingredients and split the dough into four portions for easier handling. Work in batches, keeping unused dough chilled to maintain clean twists.
How do I crush candy canes without a mess?
Place unwrapped candy canes in a zip-top bag, squeeze out the air, and tap gently with a rolling pin.
Aim for fine bits so they melt slightly onto the cookies without feeling too hard.
Why are my cookies tough?
Overmixing the dough can develop gluten and make cookies dense. Mix just until combined, and avoid heavy-handed rolling. Also, measure flour correctly by spooning it into the cup and leveling it.
Wrapping Up
These Magical Candy Cane Cookies are festive, flavorful, and surprisingly easy to make.
With a few simple techniques—chilling the dough, keeping the twists slim, and baking just until set—you’ll have a tray of cheerful cookies ready for gifting or sharing. Whether you stick to classic peppermint or try a fun variation, this recipe is one you’ll come back to every holiday season. Happy baking, and enjoy every sweet, minty bite!