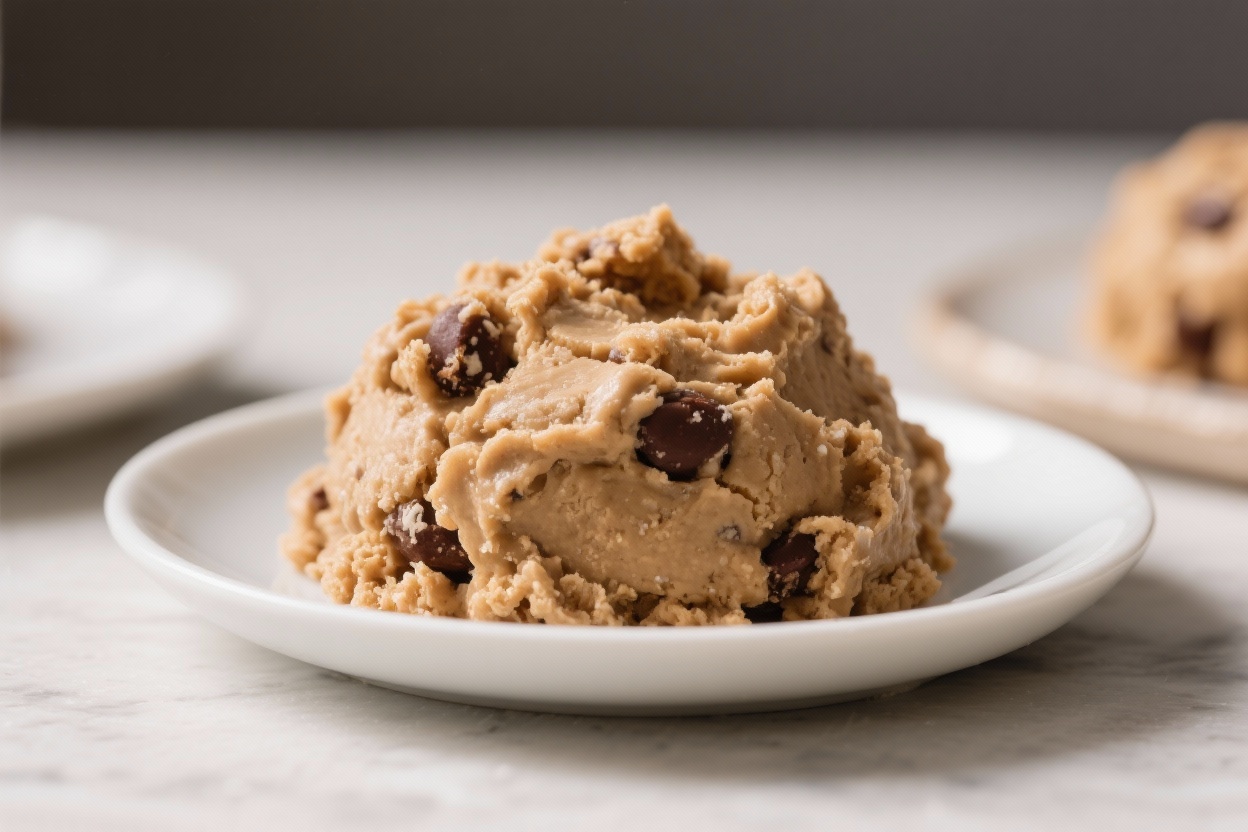
This is the cookie dough you can actually eat by the spoonful without worry. It’s creamy, sweet, and loaded with mix-ins, just like the bowl-scraped bites you love. No oven, no eggs, and a quick heat-treated flour step keep it safe and simple.
Make a small batch for a movie night, or prep it ahead for snacks all week. If you’re a texture person, you’ll love the soft dough with crunchy chocolate chips and a hint of vanilla.
What Makes This Special
This recipe gives you the nostalgic cookie dough flavor with a few smart tweaks to make it safe to eat. You’ll heat-treat the flour to kill potential bacteria and skip the eggs entirely.
The dough mixes up in one bowl and takes less than 15 minutes. It’s also easy to customize with your favorite add-ins, from sprinkles to peanut butter swirls.
Ingredients
- 1 cup all-purpose flour, heat-treated (see Instructions)
- 1/2 cup unsalted butter, softened to room temperature
- 1/2 cup light brown sugar, packed
- 1/4 cup granulated sugar
- 2–3 tablespoons milk (dairy or unsweetened non-dairy), as needed
- 1 1/2 teaspoons vanilla extract
- 1/4 teaspoon fine salt (reduce if using salted butter)
- 2/3 cup chocolate chips (mini or regular)
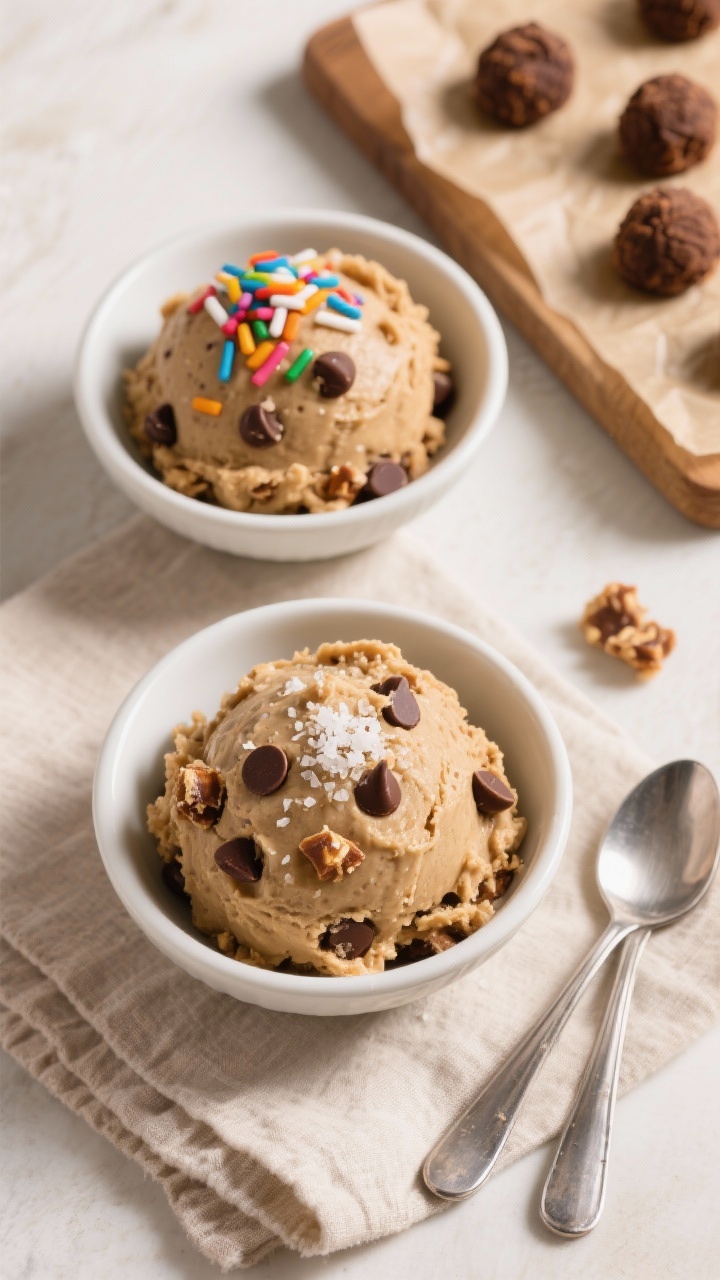
- Optional mix-ins: chopped nuts, crushed pretzels, sprinkles, peanut butter chips, or toffee bits
Instructions
- Heat-treat the flour: Spread the flour on a baking sheet. Bake at 300°F (150°C) for 7–10 minutes, stirring once, until it reaches 165°F throughout. Let it cool completely. Alternatively, microwave in a bowl in 30-second bursts, stirring between, until all of it hits 165°F. Break up any clumps.
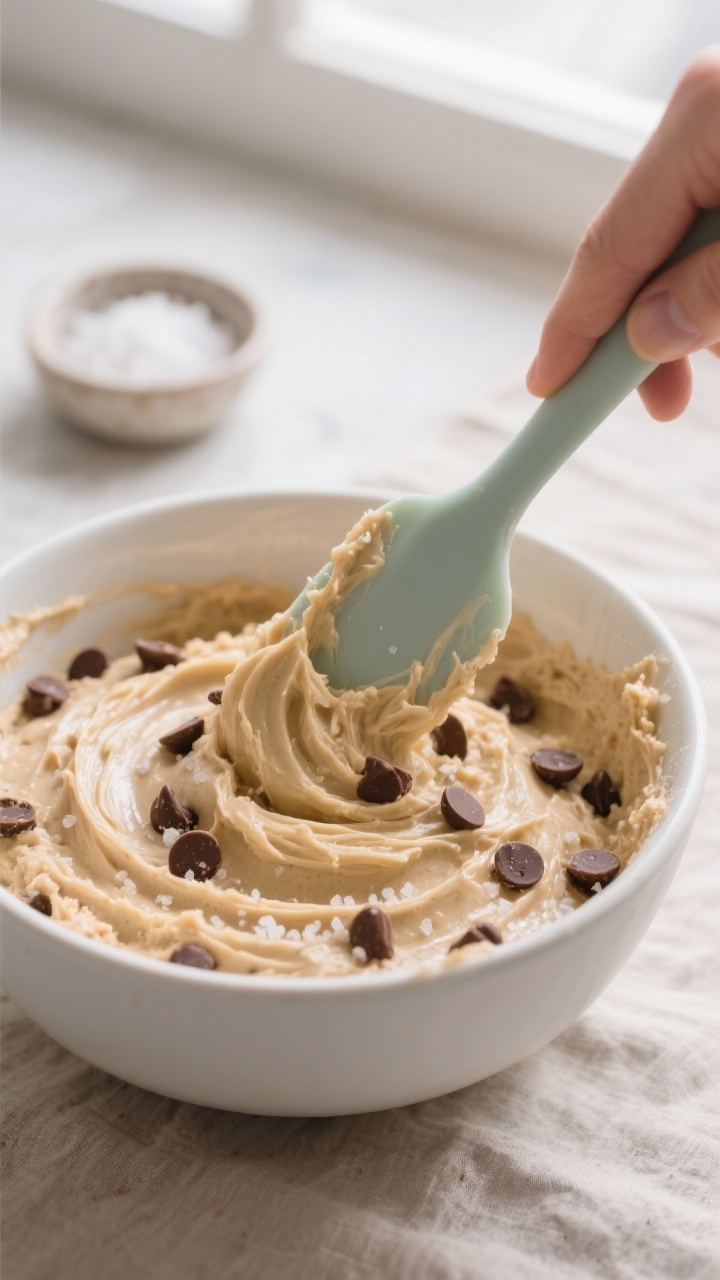
- Cream the butter and sugars: In a medium bowl, beat softened butter, brown sugar, and granulated sugar until light and fluffy, about 2 minutes. A hand mixer is easiest, but a sturdy spatula works too.
- Add flavor and moisture: Mix in vanilla and salt. Add 2 tablespoons milk and stir until smooth.
- Fold in flour: Add cooled heat-treated flour. Stir just until combined. If the dough seems dry or crumbly, add another 1–2 teaspoons of milk at a time until it’s soft and scoopable.
- Stir in mix-ins: Fold in chocolate chips (and any extras) until evenly distributed.
- Taste and adjust: Add a pinch more salt for balance or a splash of milk for creaminess. If you prefer it colder and slightly firmer, chill for 15–20 minutes.
- Serve: Scoop into bowls, roll into bite-size balls, or press into a small pan and slice into squares.
How to Store
- Refrigerator: Store in an airtight container for up to 1 week. The dough will firm up; let it sit at room temp for 5–10 minutes before scooping.
- Freezer: Freeze for up to 2 months. Portion into balls or press flat in a zip-top bag for easy snacking. Thaw in the fridge or enjoy slightly frozen.
- Avoid drying out: Press plastic wrap directly onto the dough’s surface before sealing to keep it soft.
Benefits of This Recipe
- Safe to eat: No eggs and heat-treated flour reduce common risks.
- Fast and simple: One bowl, basic pantry ingredients, and ready in minutes.
- Customizable: Swap in your favorite flavors and textures.
- Make-ahead friendly: Keeps well in the fridge or freezer for easy treats.
- Kid-approved and party-friendly: Serve in cups with spoons or as bite-size truffles.
Pitfalls to Watch Out For
- Skipping the flour step: Raw flour can harbor bacteria. Heat-treat it to 165°F throughout.
- Using warm flour: Let it cool fully before mixing or it can melt the butter and change texture.
- Overmixing: Stir just until combined to avoid a greasy or dense dough.
- Too dry or too sticky: Adjust with small splashes of milk for dryness, or add a tablespoon of flour if too wet.
- Salted butter swap: If using salted butter, reduce added salt to a tiny pinch.
Recipe Variations
- Peanut Butter Swirl: Replace 2 tablespoons of butter with creamy peanut butter. Add peanut butter chips or chopped peanuts.
- Cookies and Cream: Fold in crushed chocolate sandwich cookies and white chocolate chips.
- Funfetti: Use white chocolate chips and rainbow sprinkles. Add 1/4 teaspoon almond extract for bakery-style flavor.
- Salted Caramel Pretzel: Add crushed pretzels and toffee bits. Finish with a tiny sprinkle of flaky salt.
- Mocha Chip: Dissolve 1 teaspoon instant espresso in the milk before adding; fold in dark chocolate chips.
- Gluten-Free: Use a cup-for-cup gluten-free flour blend and heat-treat it the same way.
- Dairy-Free: Swap butter for a plant-based butter and use non-dairy milk and chocolate.
FAQ
Why do I need to heat-treat the flour?
Raw flour can contain harmful bacteria.
Heating it to 165°F makes it safer to eat in no-bake recipes. It’s a quick step that doesn’t change the flavor when you let it cool.
Can I bake cookies with this dough?
Not really. This dough is formulated for eating raw, not baking.
If you want baked cookies, use a standard cookie recipe with eggs and leavening for proper texture.
What if I don’t have a thermometer?
Bake the flour at 300°F for 7–10 minutes, stirring once halfway. This timeframe generally brings it to a safe temperature. Let it cool and break up clumps before mixing.
It turned out crumbly—how do I fix it?
Add milk a teaspoon at a time and stir until it holds together smoothly.
Temperature matters too—slightly softer butter helps bind the dough.
Can I reduce the sugar?
Yes, but the texture may be less creamy. Try cutting 1–2 tablespoons from the granulated sugar first. You can also use mini chips to keep sweetness in smaller bursts.
Is it safe for kids?
Yes, as long as you heat-treat the flour and skip eggs.
Check labels for allergens and adjust ingredients to suit your family’s needs.
How can I make bite-size truffles?
Chill the dough for 20 minutes, roll into 1-inch balls, and store cold. For a fun finish, roll in mini chips, sprinkles, or cocoa powder.
What’s the best chocolate to use?
Mini chips distribute well and give more chocolate in each bite. Dark, milk, or semi-sweet all work—pick your favorite flavor.
Can I add protein powder?
Yes.
Start with 1 scoop and reduce the flour by 2–3 tablespoons to keep the texture smooth. You may need a splash more milk.
Wrapping Up
Safe, delicious, and endlessly customizable, this no-bake cookie dough is a fast fix for sweet cravings. With heat-treated flour, no eggs, and a handful of pantry staples, you can make a batch any time.
Keep some in the fridge or freezer, change up the mix-ins, and enjoy a spoonful whenever the mood strikes.