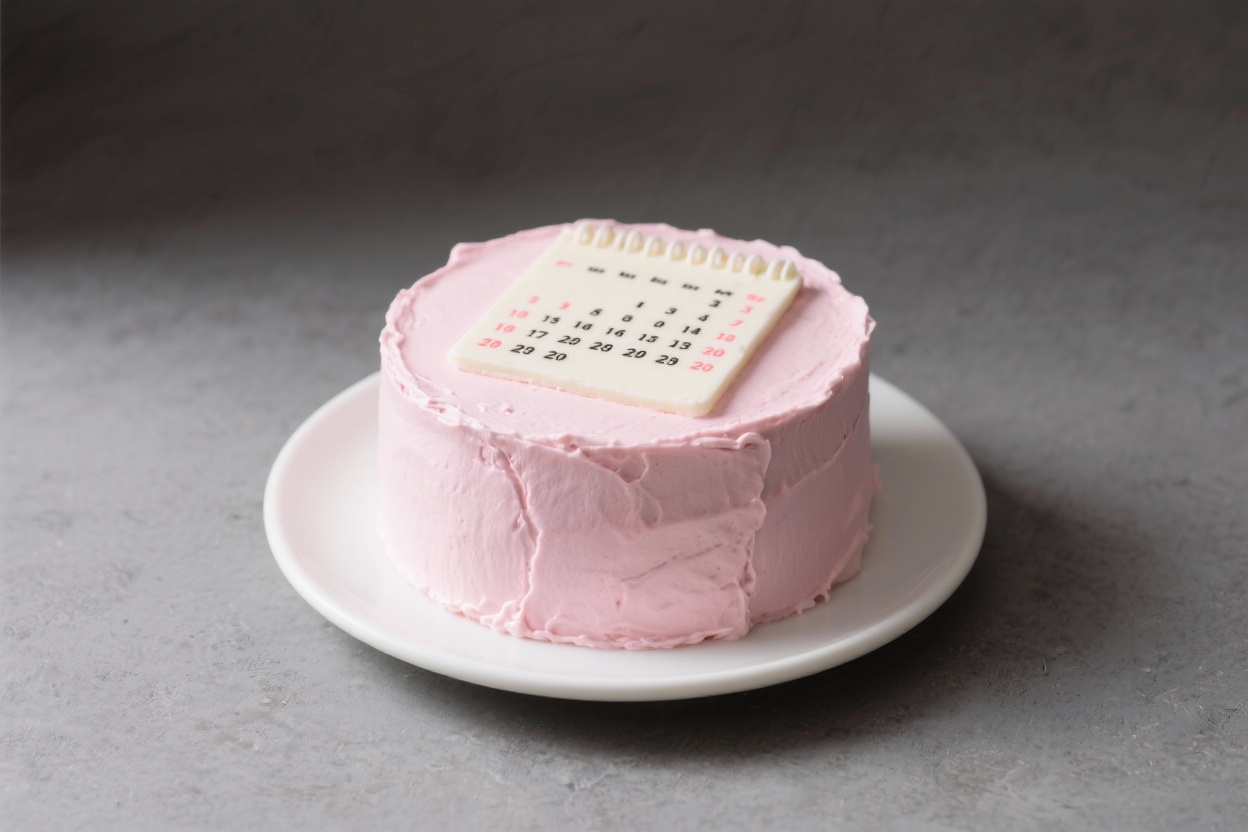
A pink calendar cake is one of those ideas that makes people stop, smile, and reach for their phones. It’s a small, minimalist buttercream cake decorated like a calendar page, with a date or message highlighted. Think soft blush frosting, tidy numbers, and a tiny heart marking the day that matters.
It looks chic, tastes comforting, and feels personal without being fussy. Whether it’s a birthday, anniversary, or countdown, this cake says it all in a playful, modern way.
What Makes This Special
This cake balances style and simplicity. The design is clean and graphic, but the flavors are classic and cozy.
It’s a small-format cake—perfect for two to six people—so it feels intimate, not over-the-top. The calendar concept lets you highlight a date, name, or short note, turning a plain cake into a keepsake moment. And because everything is buttercream, you don’t need fondant or specialty tools to make it beautiful.
- Minimalist look: Soft pink base with crisp, simple details.
- Customizable: Choose your month, day, and message.
- Approachable technique: Smooth frosting, piped numbers, and a tiny accent.
- Small and sweet: Great for intimate celebrations or gifting.
What You’ll Need
For the Vanilla Cake
- 1 1/2 cups (195 g) all-purpose flour
- 1 1/2 tsp baking powder
- 1/4 tsp fine salt
- 1/2 cup (115 g) unsalted butter, softened
- 3/4 cup (150 g) granulated sugar
- 2 large eggs, room temperature
- 1 tsp pure vanilla extract
- 1/2 cup (120 ml) whole milk, room temperature
- 2 tbsp sour cream or plain yogurt (optional, for extra moisture)
For the Buttercream
- 1 cup (230 g) unsalted butter, softened
- 3 cups (360 g) powdered sugar, sifted
- 2–3 tbsp heavy cream or milk
- 1 tsp vanilla extract
- Pinch of salt
- Pink gel food coloring (use gel for a pastel finish)
- Optional: A touch of white gel color to brighten the pink
Tools
- Two 6-inch round cake pans (or bake one and slice in half)
- Parchment paper and nonstick spray
- Offset spatula and bench scraper for smoothing
- Piping bags with small round tips (Wilton #2 or #3 for numbers)
- Toothpicks or a ruler for marking the grid
How to Make It
- Prep your pans and oven. Heat the oven to 350°F (175°C).
Line the bottoms of your cake pans with parchment and spray the sides.
- Mix the dry ingredients. Whisk flour, baking powder, and salt in a bowl. Set aside.
- Cream the butter and sugar. Beat butter and sugar until light and fluffy, about 2–3 minutes. Add eggs one at a time, then vanilla.
- Combine the batter. Add half the dry mix, then the milk and sour cream, then the remaining dry mix.
Mix on low just until smooth. Don’t overmix.
- Bake. Divide batter evenly between pans. Bake 20–25 minutes, until a toothpick comes out clean.
Cool 10 minutes in the pan, then turn out to cool completely.
- Make the buttercream. Beat butter until creamy. Add powdered sugar in two additions, mixing on low, then on medium. Add vanilla, salt, and enough cream to reach a smooth, spreadable texture.
- Tint the frosting. Scoop about one-third into a separate bowl for white piping.
Tint the remaining buttercream a soft pink with a drop or two of gel color. Adjust to a light blush.
- Level and stack. Trim cake domes if needed. Place one layer on a board, add a thin layer of pink buttercream, and stack the second layer on top.
- Crumb coat. Spread a thin layer of pink frosting around the cake to seal crumbs.
Chill 15–20 minutes.
- Smooth coat. Add a final, slightly thicker layer of pink buttercream. Use a bench scraper to smooth sides and an offset spatula for the top. Chill 10 minutes.
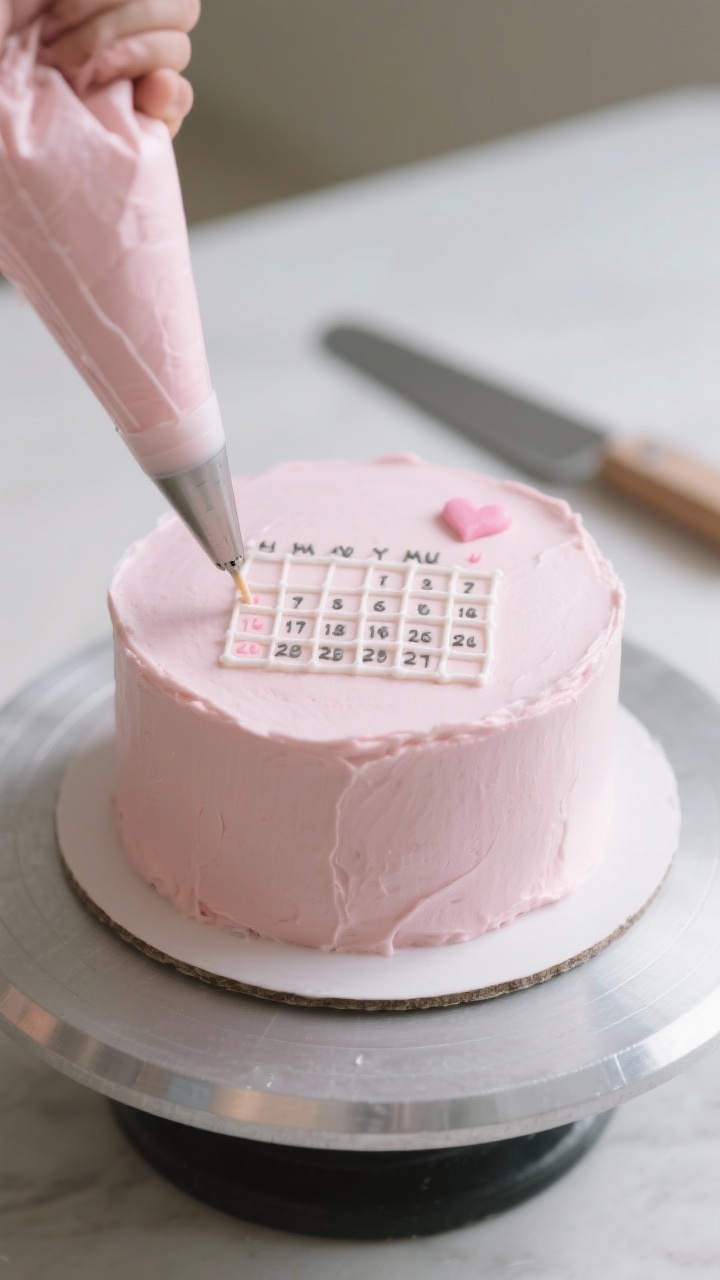
- Plan your calendar layout. Decide your month and start day.
Lightly mark a grid with a toothpick on the top of the cake: 7 columns for days of the week, and 5–6 rows depending on the month. Keep lines subtle.
- Pipe the grid and days. Fill a piping bag fitted with a small round tip with white buttercream. Pipe thin lines for the grid, or keep it ultra-minimal by piping only small ticks where numbers will sit.
Pipe tiny weekday initials along the top if you like.
- Add the numbers. Pipe the dates neatly into each square. Keep the numbers small and evenly spaced. Practice on parchment if you’re nervous.
- Highlight your date. Switch to pink-on-white or add a tiny heart or dot over the special date using a contrasting color.
You can also pipe a small outline around that square for emphasis.
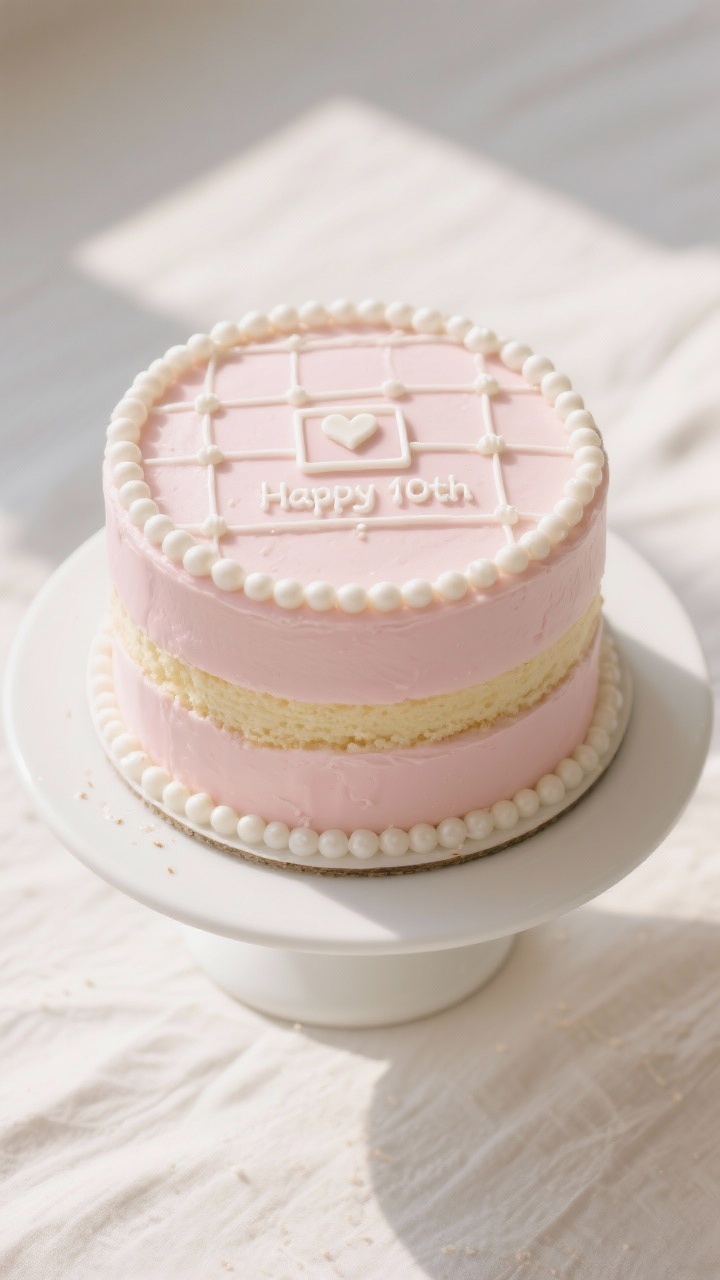
- Optional border. Pipe a delicate white pearl border around the top edge or leave it clean for a modern look.
- Chill to set. Refrigerate for 15–20 minutes to firm up the details before serving or transporting.
How to Store
- Short term: Keep the cake covered at cool room temperature for up to 6 hours.
- Overnight or longer: Refrigerate in a cake box or covered container for up to 3 days. Let it sit at room temperature 30–60 minutes before serving for the best texture.
- Freezing: Wrap unfrosted cake layers tightly and freeze up to 2 months. Thaw in the fridge, then frost and decorate.
Why This Is Good for You
Beyond the obvious joy of cake, this minimalist design encourages mindful baking.
It focuses on clean technique instead of lots of sugar-heavy decorations. Portion-wise, a 6-inch cake is a reasonable celebration size, which helps with balance. And making a cake to celebrate a special date is a small ritual that brings people together—a genuine mood boost.
- Mindful portioning: Smaller cake, big impact.
- Less fuss: No heavy fondant or complex toppers.
- Connection: A personalized date makes the celebration feel meaningful.
What Not to Do
- Don’t rush the cooling. Warm cake will melt your buttercream and ruin the finish.
- Don’t overcolor the frosting. Gel colors deepen over time; start light to keep that soft pink look.
- Don’t skip the crumb coat. It makes a huge difference in achieving clean, smooth sides.
- Don’t pipe thick grid lines. Keep them delicate so the design stays minimalist.
- Don’t overload the top with text. A few numbers and one highlight look best.
Recipe Variations
- Chocolate base: Swap 1/4 cup flour for cocoa powder, and add a touch of espresso powder for depth.
- Strawberry pink: Mix 1–2 tbsp freeze-dried strawberry powder into the frosting for a natural pink hue and fruity flavor.
- Lemon cream: Add lemon zest to the cake and a teaspoon of lemon juice to the frosting for a bright twist.
- Monochrome look: Use white frosting for the base and pale pink for the grid and numbers for a reverse effect.
- Single-layer sheet: Bake in an 8-inch square pan and pipe the calendar across the top for easy slicing.
- Dairy-free: Use vegan butter and a plant-based milk; choose a stable vegan frosting recipe you trust.
FAQ
Can I make this a day ahead?
Yes.
Frost and decorate, then refrigerate in a covered box. Bring to room temperature before serving so the buttercream softens and tastes creamy again.
What if my piping is shaky?
Practice on parchment first. Keep your hands close to the cake and steady your wrist.
You can also lightly score the numbers with a toothpick and pipe over them.
How do I get super smooth sides?
Use a chilled crumb coat, a slightly warm bench scraper, and slow, steady passes. Wipe the scraper often and keep the cake turning on a turntable if you have one.
Which pink food coloring should I use?
Gel colors give the best control and won’t thin your buttercream. Start with a toothpick amount, then adjust.
A tiny dab of white gel can soften and brighten the shade.
Can I add fresh fruit between the layers?
Yes, but keep it thin and pat fruit dry to prevent sliding. Strawberries, raspberries, or thin peach slices work well with vanilla cake and pink buttercream.
How big should the calendar squares be?
For a 6-inch cake, keep the grid light and small—aim for neat spacing rather than perfect measurements. A gentle toothpick guide helps keep everything aligned.
What if I don’t have piping tips?
Snip a very small hole in a piping bag or zip-top bag.
The lines won’t be quite as crisp, but it still looks adorable and clean.
Can I transport this easily?
Chill the cake well before travel. Place it in a snug cake box on a flat surface in the car. Bring a small bag with extra buttercream for touch-ups if needed.
How many people does a 6-inch cake serve?
About 6–8 small slices for a party, or 4–6 generous slices.
For more guests, double the recipe and make an 8-inch cake.
Can I write a short message too?
Yes—keep it minimal. A tiny “Happy 10th,” initials, or a single word under the grid keeps the design balanced and simple.
In Conclusion
The Pink Calendar Cake is proof that a small, simple idea can feel incredibly special. With soft buttercream, clean lines, and a highlighted date, it turns a sweet treat into a personal moment.
Keep the design minimal, focus on smooth frosting and tidy piping, and let the date do the talking. It’s a cake that’s cute, thoughtful, and easy to make—perfect for marking the days that matter.