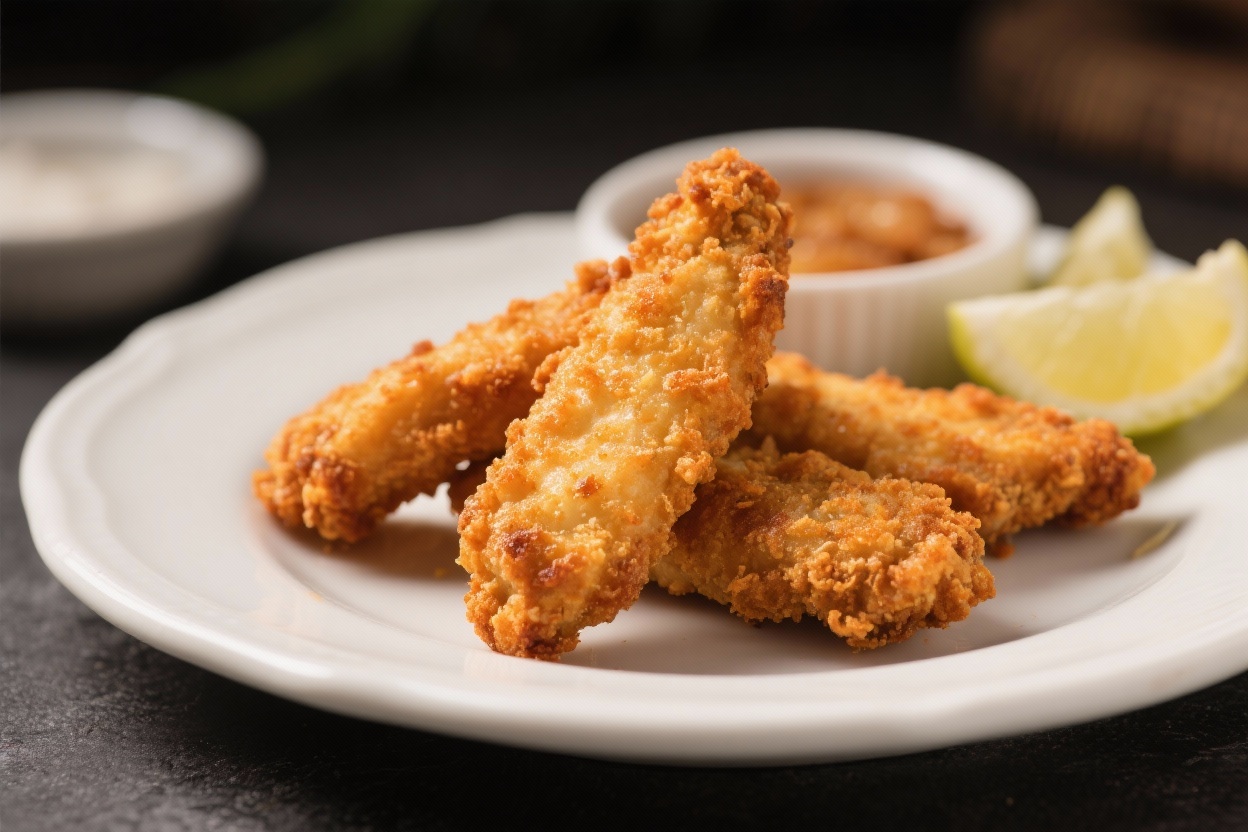
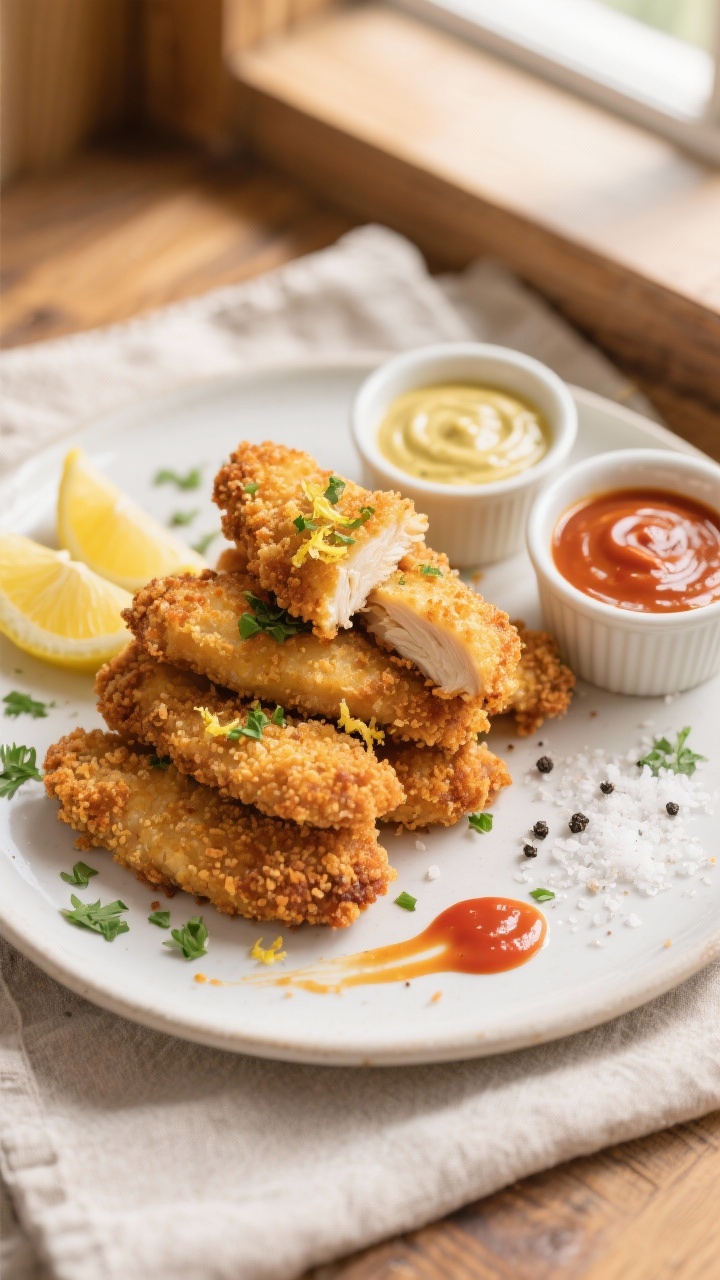
Skip the drive-thru and make chicken tenders that are actually crispy, juicy, and full of flavor. These baked tenders deliver that golden crunch you want without deep-frying or complicated steps. The coating sticks, the seasoning pops, and the chicken stays tender inside.
They’re weeknight-friendly, kid-approved, and great for meal prep. Serve them with your favorite dipping sauce and call dinner done.
What Makes This Recipe So Good
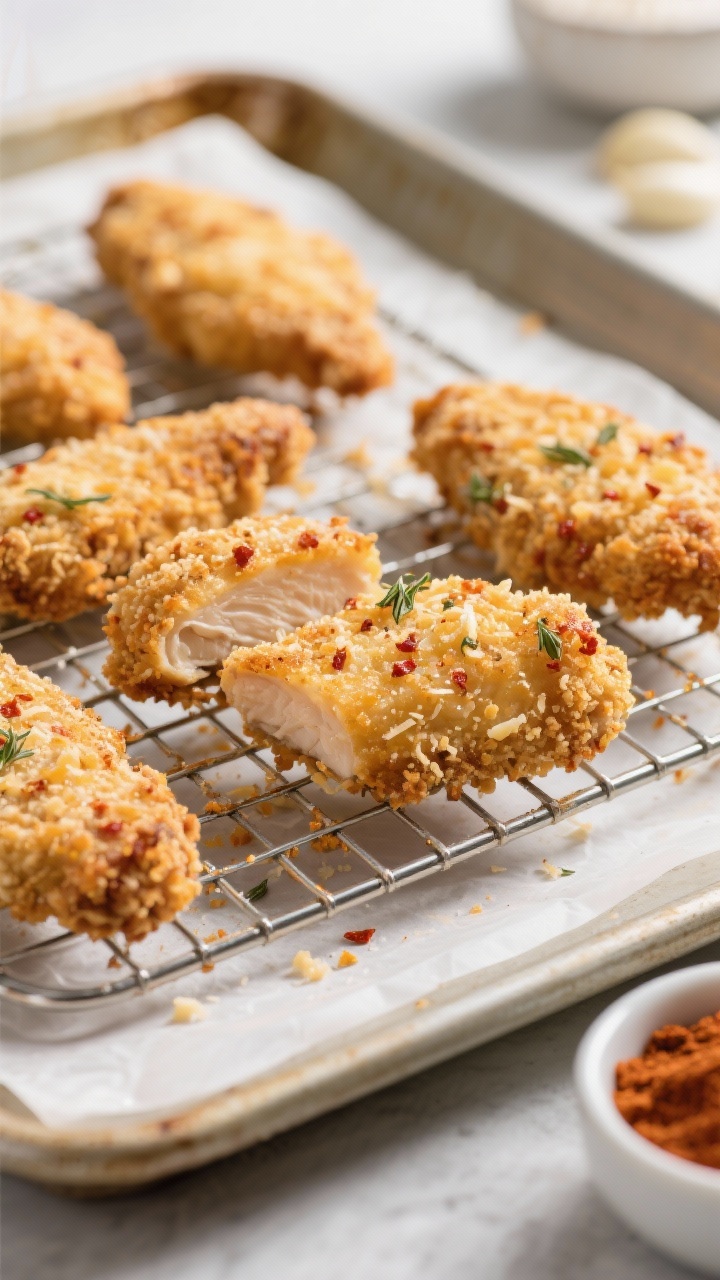
- Truly crispy without frying: A smart combo of panko and a touch of oil gives you a crunchy crust in the oven.
- Juicy every time: A quick seasoning and a simple dredge help seal in moisture so the chicken doesn’t dry out.
- Fast and simple: From start to finish, you’re looking at about 35 minutes, with very little fuss.
- Better-for-you ingredients: No heavy breading or frying oil, just clean, pantry staples.
- Versatile for any meal: Serve as a main, on salads, in wraps, or as a snack with dips.
Shopping List
- Chicken: 1.5–2 pounds chicken tenders or boneless, skinless chicken breasts cut into strips
- Flour: 1/2 cup all-purpose flour (or gluten-free blend)
- Eggs: 2 large eggs
- Panko breadcrumbs: 1.5 cups (Japanese-style for extra crunch)
- Grated Parmesan: 1/3 cup (adds flavor and crispness; optional but recommended)
- Olive oil or avocado oil: 2–3 tablespoons (for tossing with panko and greasing rack)
- Seasonings: 1.5 teaspoons kosher salt, 1 teaspoon black pepper, 1 teaspoon garlic powder, 1 teaspoon onion powder, 1 teaspoon paprika (smoked or sweet), 1/2 teaspoon dried oregano
- Optional heat: 1/2 teaspoon cayenne or chipotle powder
- Cooking spray: For the rack or parchment
- Dips: Honey mustard, ranch, barbecue sauce, buffalo sauce, or spicy mayo
How to Make It
- Preheat and prep: Set your oven to 425°F (220°C). Line a sheet pan with foil or parchment.
Place a wire rack on top and lightly coat it with cooking spray. The rack helps air circulate and keeps the breading crisp.
- Pat chicken dry: Blot the chicken with paper towels. Dry chicken holds onto the coating better and browns more evenly.
- Season the flour: In a shallow bowl, whisk together flour, 1 teaspoon salt, 1/2 teaspoon pepper, garlic powder, onion powder, paprika, and oregano.
This step builds flavor from the inside out.
- Beat the eggs: In a second bowl, whisk the eggs until smooth. Add a splash of water or milk for a thinner, more even coat if you like.
- Flavor the panko: In a third bowl, mix panko with Parmesan, remaining salt and pepper, and 2 tablespoons oil. Toss well so the panko looks lightly coated—this helps it brown and crisp in the oven.
- Dredge the chicken: Work one piece at a time.
Coat in seasoned flour (shake off excess), dip in egg, then press into the panko mixture, making sure every side is covered. Place on the prepared rack.
- Give it space: Arrange tenders with a little room between them. Crowding traps steam and softens the crust.
- Bake: Cook for 14–18 minutes, flipping once halfway through, until the coating is golden and the internal temperature reaches 165°F (74°C).
- Optional extra crisp: Broil for 1–2 minutes at the end, watching closely to avoid burning.
- Rest and serve: Let tenders rest 3 minutes so the juices settle.
Serve hot with your favorite dip.
Storage Instructions
- Fridge: Store leftovers in an airtight container for up to 4 days. Let them cool before sealing to prevent sogginess.
- Reheat: Warm in a 375°F (190°C) oven or air fryer for 6–10 minutes until crisp. Avoid the microwave if possible—it softens the crust.
- Freeze: Freeze on a sheet pan until solid, then transfer to a freezer bag for up to 2 months.
Reheat from frozen in a 400°F (205°C) oven for 15–20 minutes.
Why This is Good for You
- Lean protein: Chicken tenders or breasts provide protein without a lot of saturated fat.
- Baked, not fried: You get the crunch with far less oil, lowering overall calories and mess.
- Customizable seasoning: Control the salt, spices, and add whole-grain or gluten-free crumbs if needed.
- Better ingredients: No preservatives or mystery oils—just simple pantry staples.
What Not to Do
- Don’t skip drying the chicken: Moisture prevents the coating from sticking and crisping.
- Don’t overcrowd the pan: Space equals crisp. Use two pans or bake in batches if needed.
- Don’t forget to season the flour: That first layer is key. Bland flour equals bland tenders.
- Don’t use plain breadcrumbs alone: Panko is lighter and crunchier.
Regular crumbs can make the crust dense.
- Don’t bake at low heat: High heat helps the coating brown and stay crisp.
Variations You Can Try
- Buttermilk brine: Soak chicken in buttermilk with a pinch of salt and hot sauce for 30–60 minutes before dredging. Extra juicy and tender.
- Buffalo-style: Toss finished tenders in a mix of hot sauce and melted butter. Serve with celery and ranch.
- Coconut-crusted: Replace 1/2 cup panko with unsweetened shredded coconut.
Add lime zest to the panko mix.
- Gluten-free: Use a 1:1 gluten-free flour blend and gluten-free panko. Still super crispy.
- Everything bagel seasoning: Add 1–2 tablespoons to the panko mix for a savory twist.
- Herb and lemon: Stir lemon zest and chopped parsley into the panko. Serve with a squeeze of lemon.
- Spicy Cajun: Use Cajun seasoning in the flour and add cayenne to the panko for a kick.
FAQ
Can I use chicken breasts instead of tenders?
Yes.
Slice boneless, skinless breasts into even strips about 1-inch thick. Keep pieces similar in size so they cook evenly.
How do I keep the breading from falling off?
Pat the chicken dry, press the panko firmly onto each piece, and avoid moving them around on the rack before flipping. Shake off excess flour before the egg dip so the layers don’t get pasty.
What if I don’t have a wire rack?
Use a parchment-lined sheet pan and flip the tenders halfway.
They won’t get quite as crispy on the bottom, but it still works well.
Can I make these in an air fryer?
Absolutely. Cook at 390°F (200°C) for 10–12 minutes, flipping halfway. Don’t overcrowd the basket; air needs to circulate for crispiness.
Why add oil to the panko?
A little oil pre-coats the crumbs so they brown in the oven like they would in a pan.
It’s the secret to a deep-fried look without deep-frying.
What dipping sauces pair best?
Honey mustard, ranch, barbecue, buffalo, garlic aioli, or a simple mix of mayo, sriracha, and a squeeze of lime all work great.
Can I make them dairy-free?
Yes. Skip the Parmesan and use oil instead of butter in any sauce. The tenders will still be crisp and flavorful.
Wrapping Up
These Crispy Homemade Baked Chicken Tenders bring real crunch, bold flavor, and an easy process you can rely on.
With a few smart steps—seasoned flour, oiled panko, and high heat—you get tender chicken and a golden crust without a fryer. Keep this recipe in your weeknight rotation, switch up the seasonings, and set out a few dips. Dinner is simple, satisfying, and undeniably crispy.