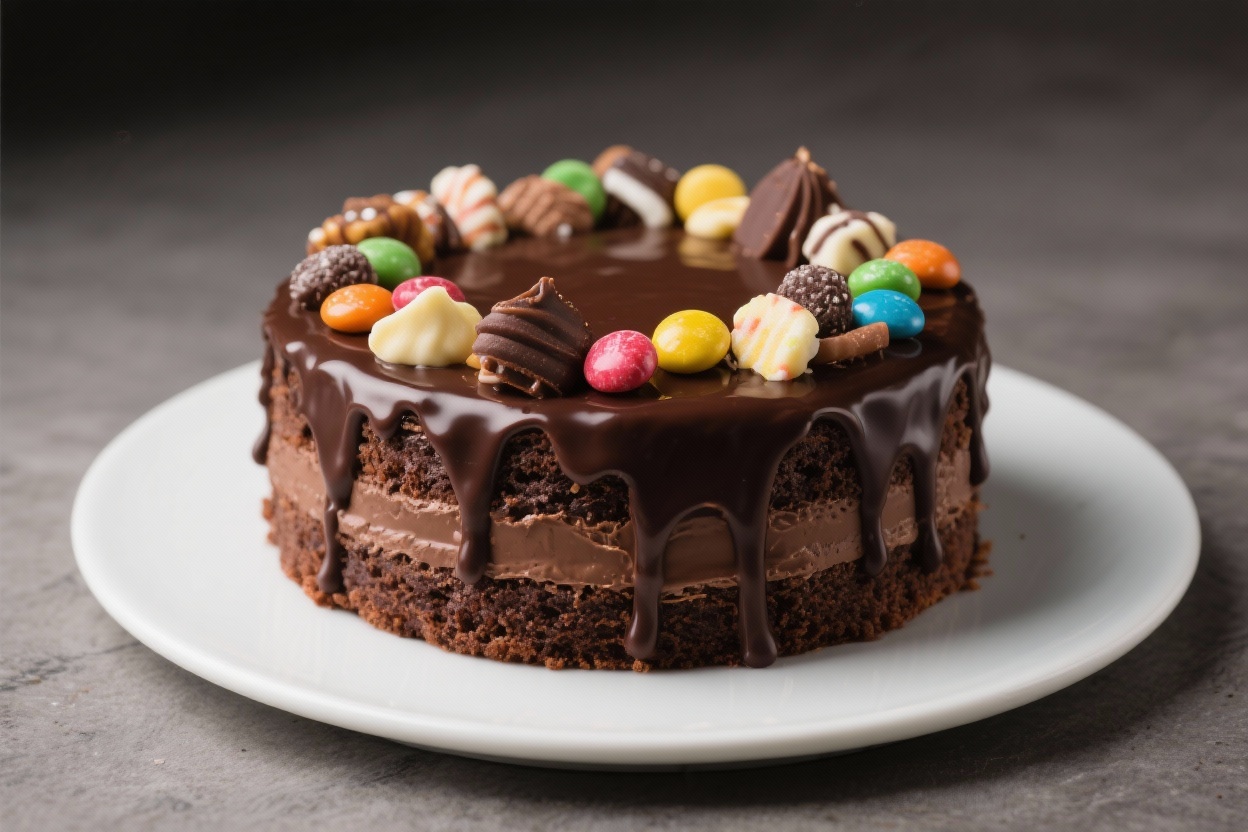
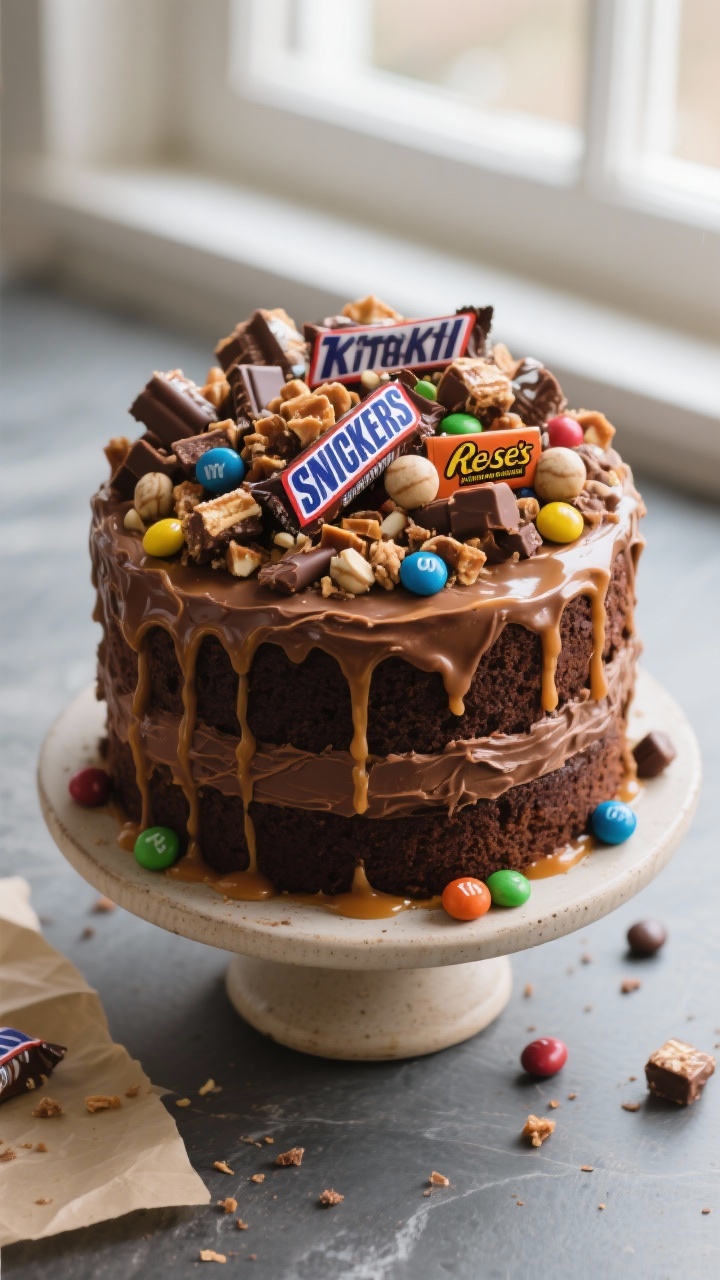
This cake is pure joy: rich chocolate layers, creamy frosting, and a playful pile of candies on top. It’s the kind of dessert that makes people smile before they even take a bite. The flavors are classic and comforting, but the toppings keep things fun and customizable.
Whether you’re celebrating a birthday or just want something special for the weekend, this cake hits the sweet spot. And yes, it looks just as good as it tastes.
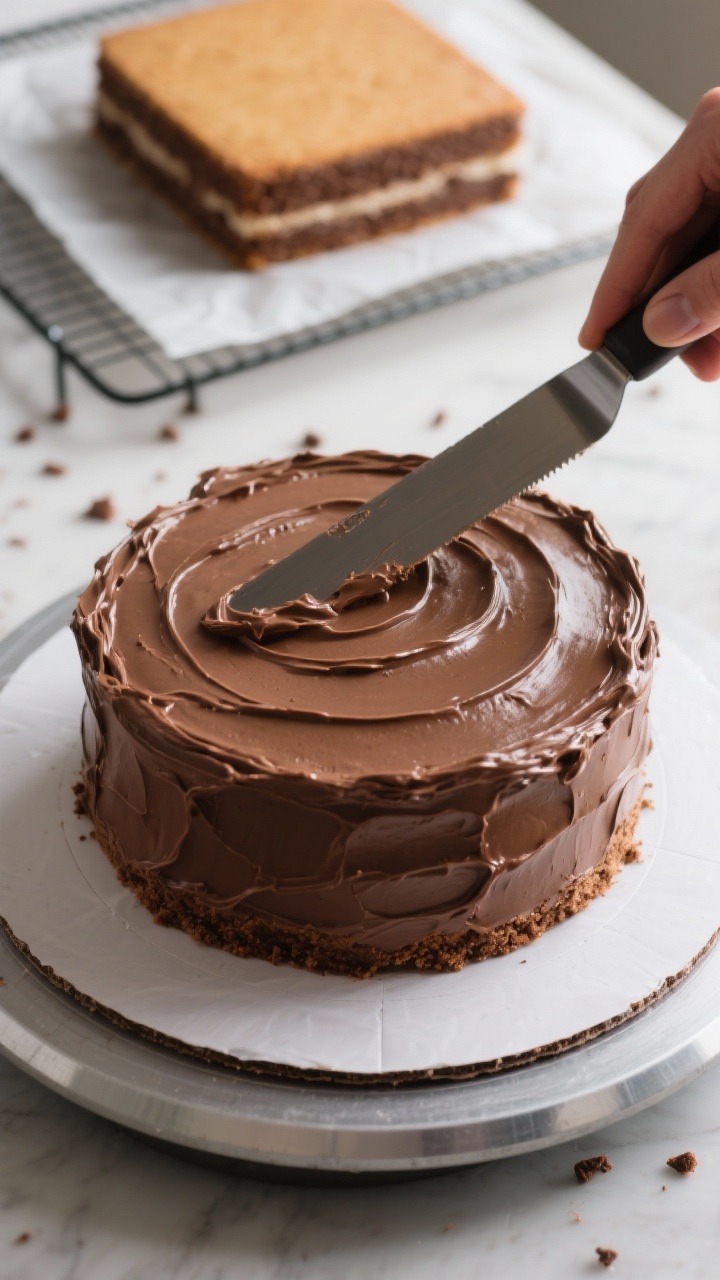
What Makes This Recipe So Good
- Moist, tender crumb: The batter uses oil and buttermilk for a soft, velvety texture that stays moist for days.
- Deep chocolate flavor: Cocoa powder and hot coffee (or hot water) bloom the chocolate for a rich, full taste without bitterness.
- Ultra-smooth frosting: A simple chocolate buttercream that’s fluffy, glossy, and easy to spread.
- Customizable candy toppings: Mix and match chocolates, caramels, gummies, and crunch for a look that’s fun and a flavor that’s layered.
- Party-ready presentation: Pile the candy high and you’ve got an instant showstopper with minimal effort.
What You’ll Need
- For the cake:
- 2 cups (240 g) all-purpose flour
- 2 cups (400 g) granulated sugar
- 3/4 cup (75 g) unsweetened cocoa powder
- 2 teaspoons baking powder
- 1 1/2 teaspoons baking soda
- 1 teaspoon fine salt
- 2 large eggs, room temperature
- 1 cup (240 ml) buttermilk, room temperature
- 1/2 cup (120 ml) neutral oil (canola or vegetable)
- 2 teaspoons vanilla extract
- 1 cup (240 ml) hot brewed coffee or hot water
- For the chocolate buttercream:
- 1 cup (225 g) unsalted butter, room temperature
- 3 cups (360 g) powdered sugar, sifted
- 1/2 cup (50 g) unsweetened cocoa powder, sifted
- 1/4 cup (60 ml) heavy cream or milk, plus more as needed
- 1 teaspoon vanilla extract
- Pinch of salt
- For the toppings:
- Assorted candy bars (chopped): Snickers, Twix, Kit Kat, Milky Way, Reese’s
- Colorful candies: M&M’s, peanut butter candies, malted milk balls
- Texture extras (optional): chocolate-covered pretzels, toffee bits, chocolate chips, caramel pieces
- Drizzles (optional): warm caramel sauce or chocolate ganache
- Equipment:
- Two 9-inch round cake pans
- Parchment paper
- Mixing bowls, whisk, spatula
- Hand or stand mixer for frosting
- Cooling racks
How to Make It
- Prep the pans: Preheat oven to 350°F (175°C). Grease two 9-inch round cake pans, line the bottoms with parchment, and lightly flour the sides.
- Mix the dry ingredients: In a large bowl, whisk flour, sugar, cocoa, baking powder, baking soda, and salt until well combined.
- Add the wet ingredients (except coffee): Whisk in eggs, buttermilk, oil, and vanilla until smooth.
The batter will be thick.
- Bloom the cocoa: Pour in the hot coffee (or hot water) and whisk gently until the batter is glossy and pourable. Do not overmix.
- Bake: Divide batter evenly between the pans. Bake 28–33 minutes, or until a toothpick comes out with a few moist crumbs.
- Cool completely: Let cakes cool in pans 10 minutes, then turn out onto racks, peel off parchment, and cool fully.
- Make the buttercream: Beat butter on medium-high until creamy and pale, 2–3 minutes. Add powdered sugar, cocoa, salt, and vanilla.
Beat on low to combine, then add cream and increase speed to medium-high until fluffy and smooth, 2 minutes. Adjust with more cream or powdered sugar for spreadable consistency.
- Level the layers (optional): If the cakes domed, use a serrated knife to level for even stacking.
- Assemble: Place one layer on a board. Spread about 1 cup frosting over top.
Add the second layer, then apply a thin crumb coat around the sides and top. Chill 15–20 minutes to set.
- Frost generously: Add a final layer of frosting, smoothing the sides and creating a slight frosting “wall” around the top edge to help hold the candies.
- Add the candy: Pile chopped candy bars and colorful candies across the top. Vary sizes and textures for the best look and bite. If using drizzles, add them now.
- Chill briefly (optional): Refrigerate 15 minutes to set the frosting before slicing for cleaner cuts.
How to Store
- Room temperature: Keep covered at cool room temp for up to 2 days.
Avoid heat so the candy doesn’t melt or bleed color.
- Refrigerator: Store covered for 4–5 days. Let slices sit out 20–30 minutes before serving so the cake softens.
- Freezer: Freeze unfrosted layers (wrapped well) for up to 2 months. Thaw in the fridge overnight.
If freezing a frosted cake, chill until firm, wrap tightly, and freeze up to 1 month. Add fresh candy after thawing for the best texture.
Why This is Good for You
This cake is a treat, but there are a few upsides. Cocoa offers antioxidants and a deep chocolate flavor without overloading the batter with fat.
A homemade cake also gives you control over the ingredients, including the kind and amount of sugar and toppings you use. And sharing a festive dessert with people you love is nourishment of a different kind—connection and celebration count, too.
Common Mistakes to Avoid
- Skipping the parchment: Without it, delicate chocolate layers can stick and tear. Line the pan bottoms.
- Overmixing the batter: This can toughen the crumb.
Mix until just combined, especially after adding the hot liquid.
- Baking too long: Dry cake is usually from overbaking. Check early and pull when the center has moist crumbs.
- Frosting warm cake: Heat melts buttercream. Cool layers completely before assembling.
- Overloading soft frosting: If the frosting is too loose, the candies will slide.
Chill briefly before piling on the toppings.
Alternatives
- Different pans: Bake as a 9×13-inch sheet cake (35–40 minutes) or cupcakes (18–22 minutes). Adjust time and test for doneness.
- Dairy-free: Use plant milk with 1 tablespoon lemon juice or vinegar as a buttermilk swap, and dairy-free butter for frosting.
- Gluten-free: Substitute a 1:1 gluten-free baking flour blend. Let the batter rest 10 minutes before baking for better hydration.
- Candy themes: Go all peanut butter, all caramel, or a cookies-and-cream vibe with crushed sandwich cookies and white chocolate.
- Less sweet option: Use dark chocolate candies, bittersweet chips, and a pinch of flake salt to balance sweetness.
- Coffee-free: Replace coffee with very hot water; you still get a rich chocolate bloom without the coffee flavor.
FAQ
Can I make the cake layers ahead of time?
Yes.
Bake and cool completely, then wrap each layer tightly in plastic and foil. Store at room temperature for 24 hours or freeze up to 2 months. Thaw before frosting.
What if I don’t have buttermilk?
Make a quick substitute: Add 1 tablespoon lemon juice or white vinegar to a measuring cup, fill to 1 cup with milk, stir, and let sit 5 minutes.
Use as directed.
Will the candy get soggy?
Most chocolate candy holds up well. Avoid gummy candies if storing in the fridge, as they can harden. Add delicate pieces (like wafer bars) just before serving for the best crunch.
How do I get clean slices?
Chill the cake 15–20 minutes, then use a long, sharp knife dipped in hot water and wiped dry between cuts.
A gentle sawing motion helps keep the candy in place.
Can I reduce the sugar?
You can cut the cake sugar by about 1/4 cup without major texture issues. For frosting, reduce powdered sugar slightly and add a bit more cocoa and cream to maintain structure.
What candies work best?
Mix a few types: creamy (caramel, peanut butter cups), crunchy (toffee, wafer bars), and colorful (M&M’s). Varied sizes and textures make each bite interesting.
How do I keep the top from sinking in the middle?
Make sure your leaveners are fresh, avoid opening the oven early, and bake until the center springs back lightly.
Cooling the cake in the pan for 10 minutes also helps set the structure.
Final Thoughts
This Decadent Chocolate Cake with Assorted Candy Toppings brings the fun back to baking. It’s simple to make, easy to customize, and reliably delicious. Whether you go all-out with candy or keep it minimal and chic, you’ll end up with a dessert that feels special.
Bake it for a birthday, a dinner party, or a quiet night in—you’ll be glad you did.