Magic Cookie Bars are the kind of dessert that makes people smile before they even take a bite. They’re layered, gooey, and loaded with all the good stuff: chocolate, coconut, nuts, and a buttery graham cracker crust. Best of all, they’re ridiculously easy to make.
No mixers, no fuss, and just one pan. If you want a dessert that delivers maximum payoff with minimal effort, this is it.
What Makes This Recipe So Good
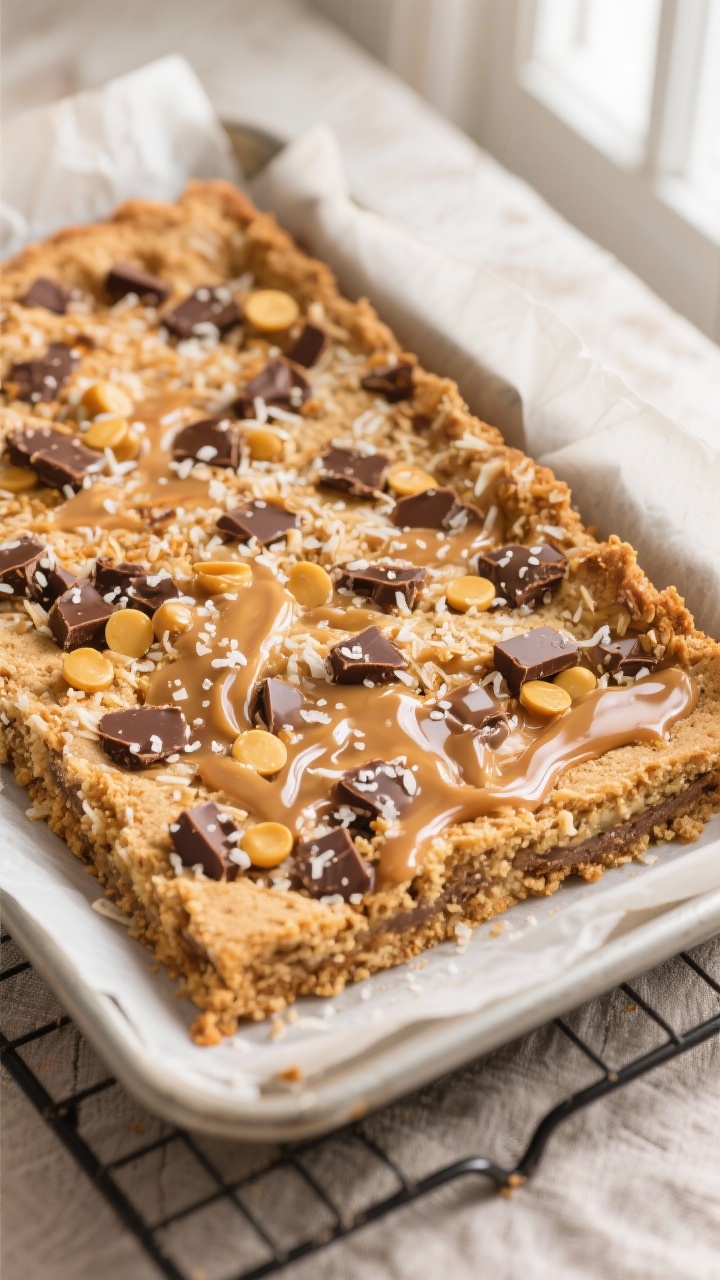
Magic Cookie Bars feel nostalgic and cozy, but they never go out of style. The layers bake into each other to create a chewy, crunchy, caramel-like bite in every square.
They’re perfect for potlucks, holiday trays, bake sales, or a weekend treat. You can customize them easily, and they still come out great. Plus, cleanup is simple since everything bakes in the same pan.
- Foolproof method: The sweetened condensed milk brings everything together without needing a separate batter.
- Great texture combo: Buttery crust, melty chocolate, toasted coconut, and crunchy nuts.
- Make-ahead friendly: They slice better and taste even better the next day.
- Endlessly customizable: Swap chips, add mix-ins, or skip nuts if you need to.
Ingredients
- 1/2 cup (1 stick) unsalted butter, melted
- 1 1/2 cups graham cracker crumbs (about 10–12 full sheets)
- 1/4 teaspoon fine salt (optional but recommended)
- 1 can (14 ounces) sweetened condensed milk
- 1 1/2 cups semi-sweet chocolate chips
- 1 cup butterscotch chips (or white chocolate chips)
- 1 1/2 cups sweetened shredded coconut
- 3/4 to 1 cup chopped nuts (walnuts, pecans, or almonds)
- 1 teaspoon vanilla extract (optional, to mix with the condensed milk)
- Flaky sea salt for finishing (optional)
Step-by-Step Instructions
- Prep the pan: Heat the oven to 350°F (175°C).
Line a 9×13-inch baking pan with parchment, leaving an overhang on two sides for easy lifting. Lightly grease the parchment.
- Make the crust: In a bowl, combine melted butter, graham cracker crumbs, and salt. Stir until the crumbs are evenly moistened and look like wet sand.
- Press and set: Press the crumb mixture firmly into the bottom of the pan.
Use the bottom of a measuring cup to pack it down. This helps the crust stay crisp.
- Layer the goodness: Sprinkle chocolate chips evenly over the crust. Add the butterscotch chips, then the nuts, then the coconut.
Spread each layer to the edges.
- Add the binder: Stir the vanilla into the sweetened condensed milk if using. Drizzle the milk evenly over the entire surface, making sure it reaches the corners. Don’t dump it in one spot—slow and steady creates even coverage.
- Bake: Bake for 22–28 minutes, until the edges are golden brown and the coconut is lightly toasted.
The center should look set and a bit bubbly.
- Cool completely: Let the pan cool on a rack for at least 2–3 hours. For clean edges, chill for 30–60 minutes after cooling.
- Slice and finish: Use the parchment to lift the slab out. Cut into bars with a sharp knife.
If you like, sprinkle a pinch of flaky sea salt on top to balance the sweetness.
Keeping It Fresh
Magic Cookie Bars store well, which makes them great for planning ahead. Keep them in an airtight container at room temperature for 3–4 days. If your kitchen runs warm, refrigerate them for up to a week.
They’ll be a little firmer from the chill but still delicious.
For longer storage, freeze cut bars in a single layer until solid, then stack with parchment between layers in a freezer bag. They keep well for up to 2 months. Thaw at room temperature for 30–45 minutes before serving.
Why This is Good for You
While these are definitely a treat, there are a few bright spots. Nuts add healthy fats, fiber, and protein, which help with satiety. Coconut brings texture and some natural fats, contributing to richness without needing more butter.
And because the bars are rich, smaller portions still feel satisfying.
If you want to make them a touch lighter, you can trim the sweetness or add more nuts and seeds. But at the end of the day, these are a classic dessert meant to be enjoyed, shared, and savored.
Pitfalls to Watch Out For
- Underbaking: If the coconut isn’t golden and the edges aren’t set, the bars may fall apart. Give them a few extra minutes.
- Overbaking: Too much time in the oven can make the crust hard and the coconut bitter.
Watch closely during the last 5 minutes.
- Uneven layering: Clumps of chips or coconut lead to uneven texture. Spread each layer evenly to the edges.
- Rushing the cool time: Cutting too soon causes messy crumbles. Let them cool completely for clean slices.
- Too much moisture: If your crust isn’t tightly packed, the condensed milk can seep under and make it soggy.
Press that crust firmly.
Alternatives
- Gluten-free: Use gluten-free graham crackers or almond flour. For almond flour, combine 2 cups almond flour with 6 tablespoons melted butter and 2 tablespoons sugar to form the crust.
- Dairy-free: Swap the butter for coconut oil or a dairy-free butter. Use dairy-free chocolate chips and a dairy-free sweetened condensed coconut milk.
- Nut-free: Skip the nuts and add more coconut or sunflower seeds for crunch.
Pumpkin seeds also work well.
- Less sweet: Use dark chocolate chips, reduce butterscotch chips, and add a pinch of flaky salt on top to balance flavors.
- Flavor twists: Add 1/2 teaspoon ground cinnamon to the crust, or sprinkle on chopped dried cherries or cranberries before baking.
FAQ
Can I use a different pan size?
Yes. A 9×9-inch pan will yield thicker bars and may need 3–6 extra minutes of bake time. An 8×8 will be even thicker; watch for golden edges and toasted coconut as your cues.
Do I need to toast the coconut first?
No.
It toasts nicely in the oven as the bars bake. If you want a deeper toast, you can briefly toast it on a sheet pan for 3–5 minutes before layering, but it’s optional.
What if I don’t have graham crackers?
Use digestive biscuits, vanilla wafers, or shortbread. Even chocolate wafer cookies work for a richer crust.
Adjust butter slightly if the crumbs seem too dry or too oily.
How do I get super clean slices?
Chill the bars after they cool, then use a sharp knife. Wipe the blade between cuts. This keeps the layers neat and prevents smearing.
Can I make them ahead for an event?
Absolutely.
Bake a day in advance and store at room temp, covered. They slice better the next day and hold up well on dessert tables.
Are butterscotch chips necessary?
No. You can use all chocolate chips or mix in peanut butter chips, white chocolate, or chopped candy bars.
Keep the total chips around 2 1/2 cups for best structure.
Final Thoughts
Magic Cookie Bars are a true “set it and forget it” kind of dessert. They’re cozy, shareable, and endlessly adaptable. Whether you keep them classic or add your own twist, you’ll end up with something sweet, sticky, and completely satisfying.
Bake a pan, let them cool, and enjoy that first chewy, chocolatey square. It’s a little bit of magic in every bite.