
These Easy Lemon Bars are the kind of dessert that makes people smile before they even take a bite. They’re sunny, tangy, and just sweet enough, all sitting on a buttery shortbread crust. If you love lemon desserts but don’t want anything complicated, this recipe is for you.
The steps are simple, the ingredients are basic, and the results taste like a bakery treat. Make a batch for a potluck, a picnic, or just a weekday pick-me-up—you’ll be glad you did.
What Makes This Special
These lemon bars strike the perfect balance: a crisp, buttery base and a smooth, custardy lemon layer that sets beautifully. The crust comes together in minutes with pantry staples, and the filling uses fresh lemon juice for bright flavor.
There’s no need for special equipment—just a bowl, whisk, and pan. And the flavor? Bold, clean lemon that isn’t cloyingly sweet, with a tender texture that slices neatly.
Ingredients
- For the shortbread crust:
- 1 cup (226 g) unsalted butter, softened
- 1/2 cup (100 g) granulated sugar
- 2 cups (240 g) all-purpose flour
- 1/4 teaspoon fine salt
- 1 teaspoon vanilla extract (optional, but lovely)
- For the lemon filling:
- 1 1/2 cups (300 g) granulated sugar
- 1/4 cup (30 g) all-purpose flour
- 4 large eggs
- 2/3 cup (160 ml) fresh lemon juice (about 3–4 lemons)
- 1 tablespoon lemon zest (finely grated)
- Pinch of salt
- For finishing:
- Powdered sugar, for dusting
Step-by-Step Instructions
- Prep your pan and oven. Heat the oven to 350°F (175°C).
Line a 9×13-inch baking pan with parchment, leaving overhang for easy lifting. Lightly grease the sides.
- Make the crust. In a large bowl, beat the softened butter with the sugar until smooth and creamy, 1–2 minutes. Mix in the flour, salt, and vanilla (if using) just until the dough looks crumbly and holds when pressed.
- Press and bake. Scatter the crust mixture into the pan.
Press it firmly and evenly into the bottom with your fingers or the bottom of a measuring cup. Prick a few times with a fork to prevent bubbles. Bake for 18–20 minutes, until the edges are lightly golden.
- Whisk the filling. While the crust bakes, whisk the sugar and flour in a bowl to break up lumps.
Add the eggs and whisk until smooth, then whisk in lemon juice, zest, and a pinch of salt. The mixture should be silky and well combined.
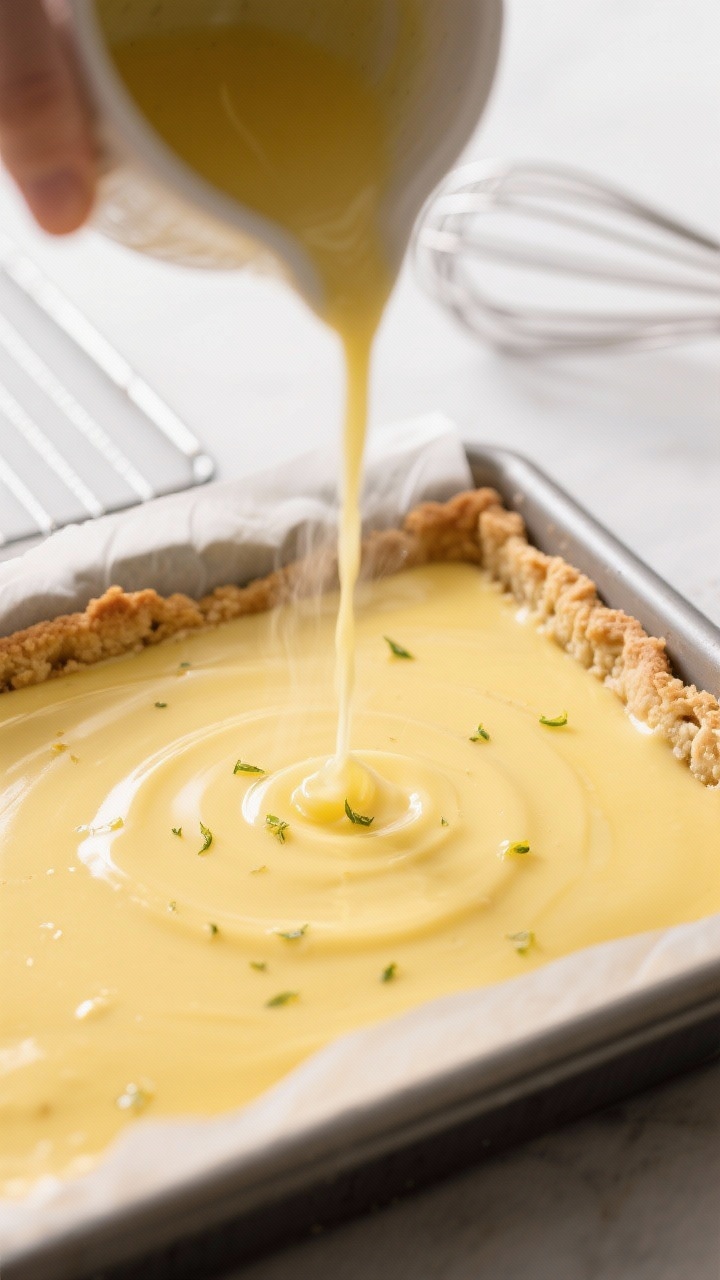
- Pour on hot crust. Give the filling one last whisk, then pour it over the hot crust. Don’t let the crust cool; the heat helps set the custard evenly.
- Bake until just set. Return to the oven for 18–22 minutes.
The center should look set with a slight jiggle but not liquid. If you gently tap the pan, it should ripple softly, not slosh.
- Cool completely. Let the pan cool on a rack for 1 hour. Transfer to the fridge for at least another hour to firm up.
This makes slicing clean and easy.
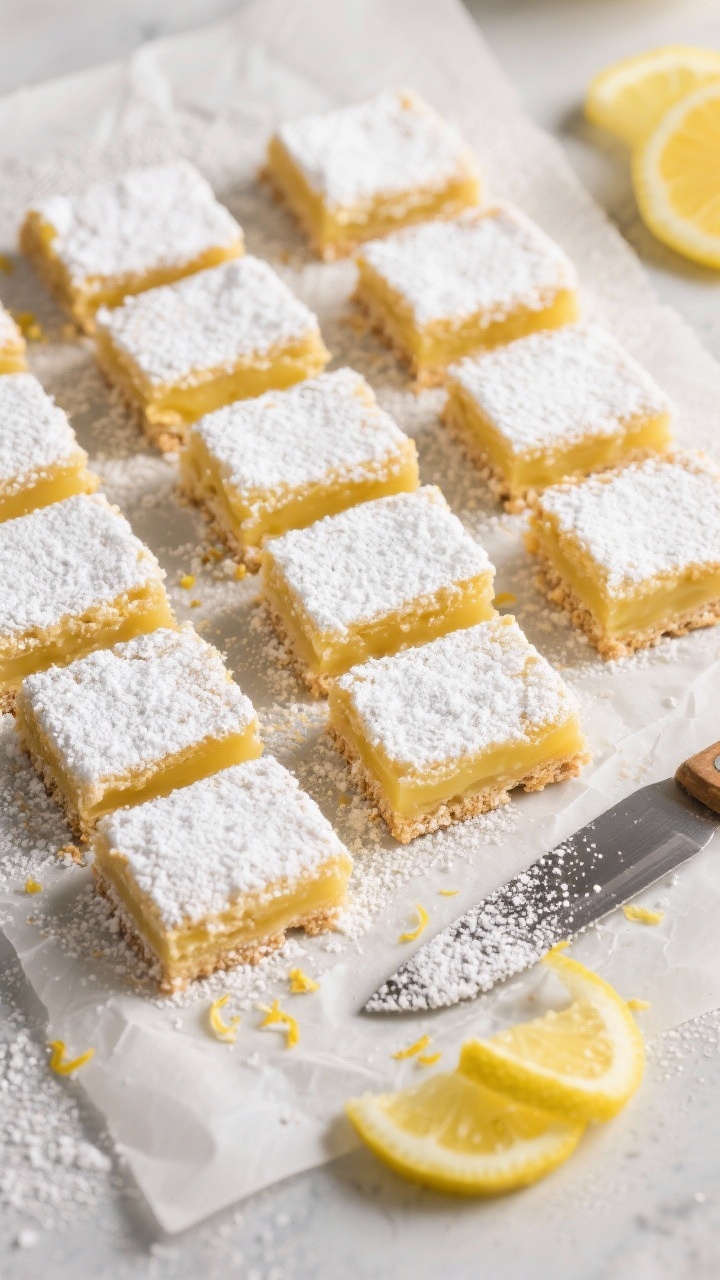
- Finish and slice. Dust generously with powdered sugar. Lift out using the parchment and cut into bars with a sharp knife. Wipe the blade between cuts for neat edges.
Storage Instructions
- Room temperature: Keep covered for up to 1 day if your kitchen is cool.
- Refrigerator: Store in an airtight container for 4–5 days.
Add a fresh dusting of powdered sugar before serving.
- Freezer: Freeze bars (undusted) in a single layer until firm, then transfer to a sealed bag or container for up to 2 months. Thaw in the fridge and dust with sugar before serving.
Health Benefits
While lemon bars are a treat, they do offer a few bright spots. Fresh lemons provide vitamin C, which supports immune health and helps with collagen formation.
Lemon zest brings antioxidants and bold flavor without extra calories. The bars are portionable, so you can enjoy a small square to satisfy a sweet-tart craving.
If you’d like to lighten things up, consider using a bit less sugar in the filling (reduce by 2–3 tablespoons) without losing the signature zing. You can also substitute part of the all-purpose flour in the crust with finely ground almonds for a touch of healthy fats and extra flavor.
Common Mistakes to Avoid
- Using bottled lemon juice. It often tastes flat or bitter.
Freshly squeezed juice and zest make a huge difference.
- Overbaking the filling. If the top browns deeply or cracks, it’s likely overdone. Pull it when it’s just set with a slight jiggle.
- Skipping the cool time. Cutting too soon leads to messy, runny slices. Chill until firm for clean bars.
- Underbaked crust. If the crust isn’t lightly golden before adding the filling, it can turn soggy.
Give it time to set.
- Not lining the pan. Parchment makes removal and slicing easy. It also prevents sticking at the edges.
Alternatives
- Gluten-free: Use a cup-for-cup gluten-free flour blend in both crust and filling. Add 1–2 tablespoons cornstarch to the crust if the blend is very starchy for better structure.
- Dairy-free: Swap butter with a high-quality plant-based butter stick (not spreadable tub).
The texture will stay crisp and buttery.
- Less sweet: Reduce sugar in the filling to 1 1/4 cups for a punchier tart flavor. Keep the crust sugar as written for structure.
- Meyer lemon: Use Meyer lemons for a softer, floral citrus note. They’re naturally sweeter, so you can reduce sugar by 2 tablespoons if desired.
- Lime bars: Swap lemon juice and zest with lime for a bright, tropical twist.
A pinch of coconut in the crust is a fun add-on.
- Almond crust: Replace 1/2 cup of the flour in the crust with almond flour and add 1/2 teaspoon almond extract for a nutty crumb.
FAQ
Why is my lemon layer cloudy or pale?
Overmixing can incorporate too much air, leading to a lighter, cloudy look. Whisk just until smooth. Also, fresh zest adds golden flecks and a warmer color, so don’t skip it.
How do I get sharp, clean slices?
Chill the bars thoroughly, then use a long, sharp knife.
Wipe the blade after each cut and use a gentle sawing motion. A dusting of powdered sugar after slicing also helps keep edges neat.
Can I make these ahead?
Yes. Lemon bars are excellent make-ahead treats.
Bake the day before, chill overnight, and dust with powdered sugar just before serving.
My crust crumbled—what went wrong?
It may not have been packed firmly enough. Press it down tightly, especially in the corners, and bake until lightly golden before adding the filling. Measuring flour accurately also helps prevent a dry, crumbly base.
Can I halve the recipe?
Absolutely.
Use an 8×8-inch pan and reduce bake times slightly—about 15–17 minutes for the crust and 16–20 minutes for the filling. Keep an eye on the set rather than the clock.
Do I need to strain the filling?
Not required, but you can strain it if you prefer a perfectly smooth custard or if your zest is coarse. Straining removes any egg threads and gives a silkier texture.
How do I prevent a sugary top crust?
If sugar rises and creates a thin crust, it’s usually due to overwhisking or a very hot oven.
Whisk gently and bake at the recommended temperature. A final dusting of powdered sugar hides minor cosmetic issues.
In Conclusion
Easy Lemon Bars are a no-fuss dessert with big payoff: bright flavor, a tender custard, and a buttery, crisp base. With a few simple ingredients and mindful timing, you’ll get bars that slice cleanly and taste like sunshine.
Keep this recipe in your back pocket for any gathering or simple weeknight treat. It’s reliable, quick, and always a crowd-pleaser.