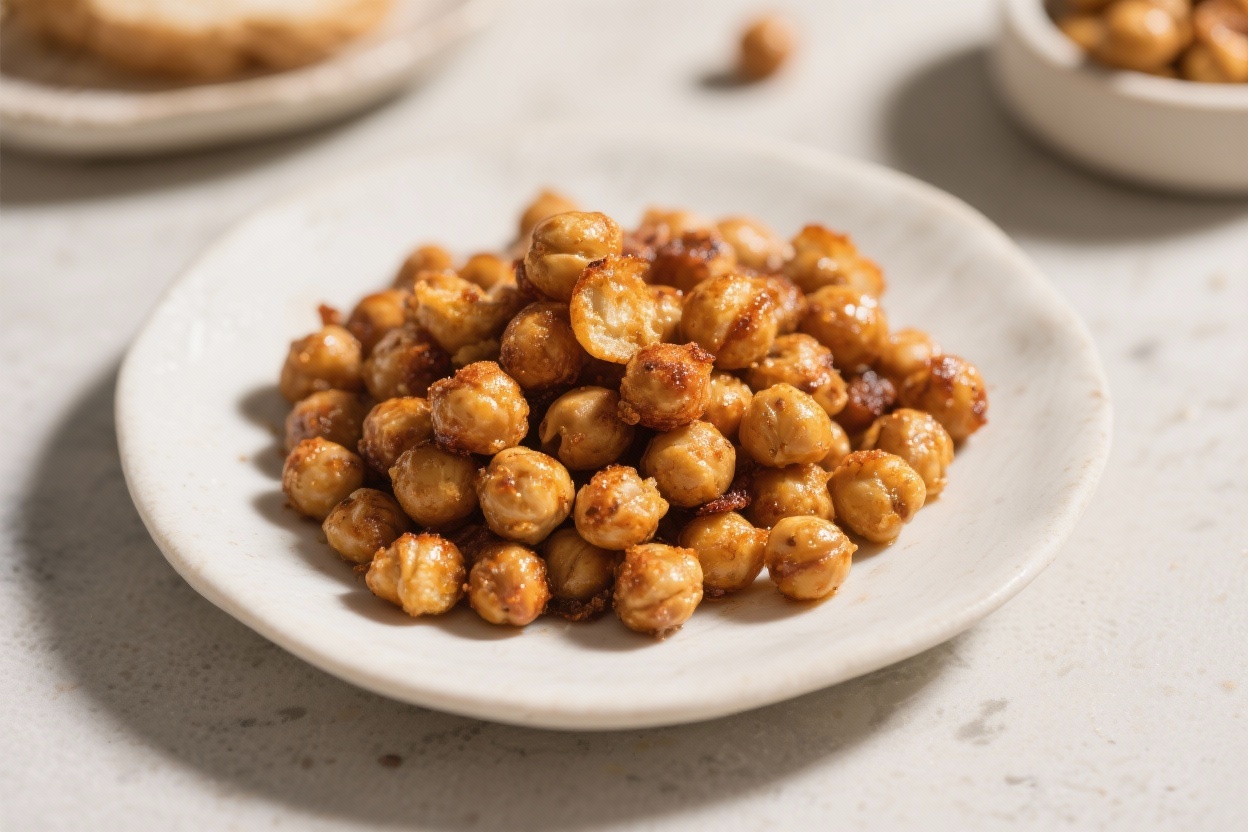
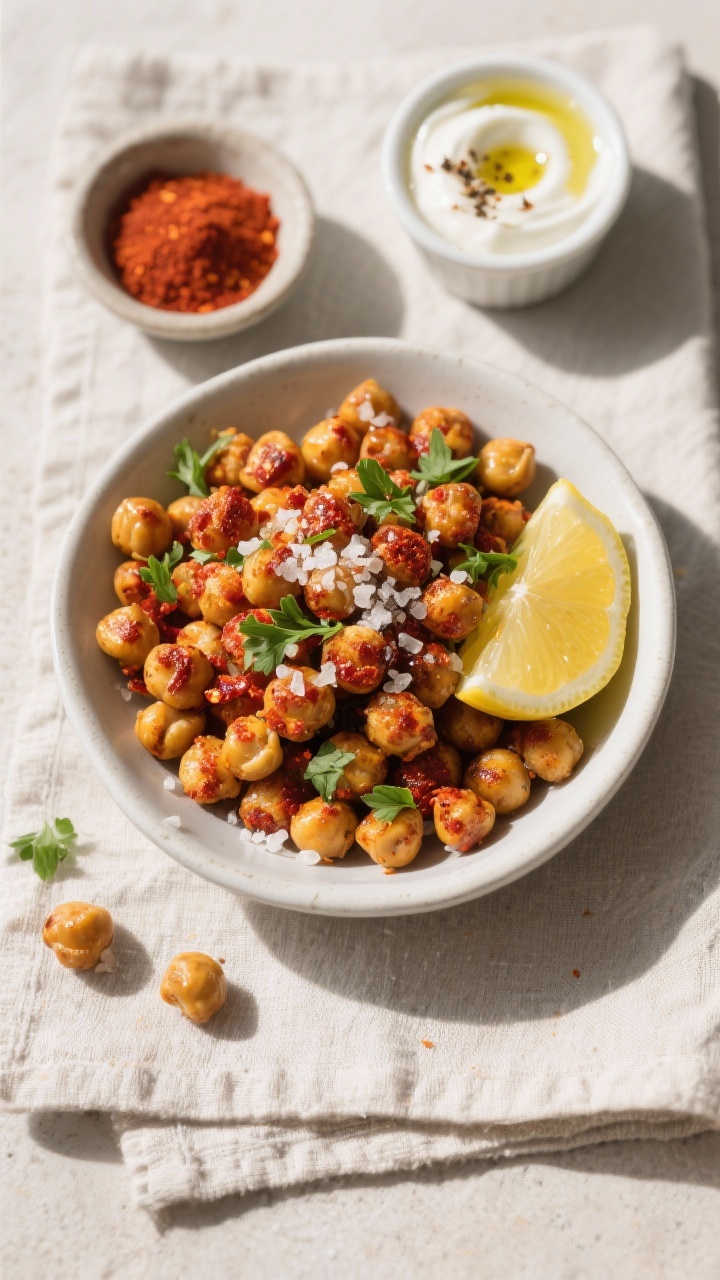
Crispy roasted chickpeas are the kind of snack you’ll find yourself reaching for again and again. They’re salty, crunchy, and endlessly customizable, whether you like them spicy, smoky, or herby. You can toss them on salads, scatter them over soups, or eat them by the handful.
Best of all, they take just a few pantry ingredients and some oven time. If you’re after a satisfying, better-for-you crunch, this recipe delivers.
What Makes This Recipe So Good
- Seriously crispy texture: The method here focuses on drying the chickpeas well and baking them hot so they stay crunchy longer.
- Simple ingredients: Just chickpeas, oil, and spices you likely already have.
- Endlessly flexible: Go smoky, spicy, garlicky, or sweet. The base method works with almost any flavor profile.
- Meal-prep friendly: Make a batch at the start of the week to top salads and bowls.
- High in plant protein and fiber: A snack that actually fills you up and keeps you satisfied.
What You’ll Need
- 2 cans (15 ounces each) chickpeas (garbanzo beans), drained and rinsed
- 1.5 to 2 tablespoons olive oil (or avocado oil)
- 1 teaspoon fine sea salt
- 1 teaspoon smoked paprika (or sweet paprika)
- 1/2 teaspoon garlic powder
- 1/2 teaspoon ground cumin
- 1/4 to 1/2 teaspoon black pepper
- Optional heat: 1/4 teaspoon cayenne or chipotle powder
- Optional sweet twist: 1 teaspoon maple syrup plus 1/2 teaspoon cinnamon (skip if going savory)
Equipment: Sheet pan, parchment paper (optional), clean kitchen towel or paper towels, mixing bowl, spatula.
Instructions
- Preheat the oven. Set your oven to 425°F (220°C). Line a sheet pan with parchment for easy cleanup, or use a bare pan for extra crisping.
- Drain and rinse well. Pour the chickpeas into a colander, rinse under cool water, and shake off as much water as possible.
- Dry thoroughly. Spread the chickpeas on a clean kitchen towel or paper towels. Gently rub them dry. Remove and discard any loose skins you see, but don’t stress about getting every last one.
- Pre-bake to dry (key step). Spread chickpeas on the sheet pan in a single layer. Bake for 10–12 minutes without oil or spices. This step removes surface moisture and boosts crispness.
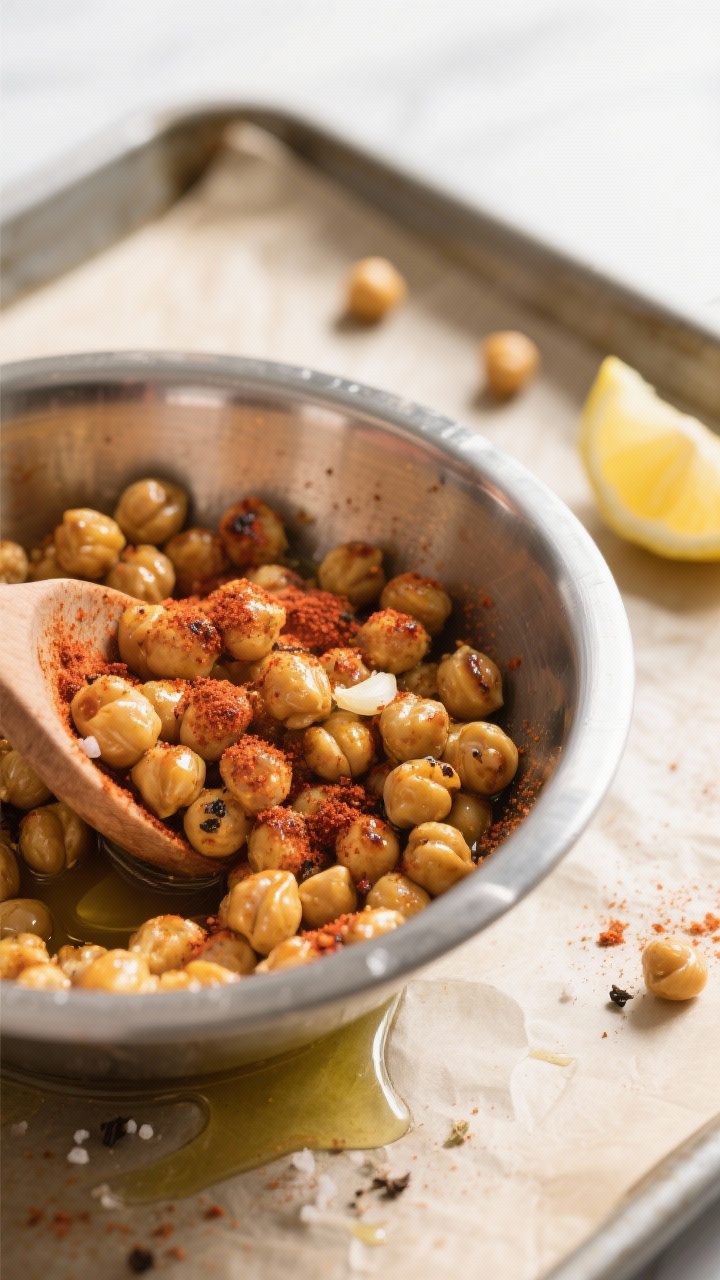
- Toss with oil and spices. Pull the pan from the oven. Transfer chickpeas to a bowl, add olive oil, salt, paprika, garlic powder, cumin, and pepper. Stir to coat evenly.
- Finish roasting. Return the seasoned chickpeas to the pan. Roast 15–20 minutes more, shaking the pan or stirring every 7–8 minutes. You’re aiming for deep golden and crisp, not dark brown.
- Cool on the pan. Turn off the oven and open the door for a moment to vent heat. Let the chickpeas cool on the pan for 10–15 minutes. They crisp up more as they cool.
- Adjust seasoning. Taste and add a pinch more salt or a squeeze of lemon while warm for brightness. If making the sweet version, toss with a drizzle of maple syrup and cinnamon right after roasting, then let cool fully.
How to Store
- Room temperature: Store completely cooled chickpeas in a loosely covered container or a jar with the lid slightly ajar for up to 3 days. Trapped steam makes them soggy, so avoid fully airtight containers right away.
- Longer storage: After day 3, move to an airtight container. They may soften. To re-crisp, warm on a sheet pan at 350°F (175°C) for 5–8 minutes.
- Avoid the fridge: Refrigeration adds moisture and hurts the crunch. Keep them dry and at room temp for best texture.
Health Benefits
- Protein and fiber: Chickpeas pack plant-based protein and fiber that help keep you full and support digestion.
- Steady energy: Their complex carbs release slowly, preventing sharp blood sugar spikes.
- Heart-friendly: The combination of fiber, potassium, and low saturated fat supports heart health.
- Mineral-rich: Chickpeas contain iron, magnesium, and zinc, which are important for energy, nerve function, and immunity.
- Better-for-you snack: When roasted with a light touch of oil and spices, they’re a crunchy alternative to heavily processed snacks.
Common Mistakes to Avoid
- Skipping the drying step: Excess moisture is the enemy of crispness. Pat dry well and pre-bake to remove surface water.
- Overcrowding the pan: Chickpeas need space and airflow. Use two pans if necessary.
- Adding oil too early: Oil traps moisture if added before pre-drying. Season after the initial bake.
- Baking too low: A hot oven is key. Temperatures below 400°F often lead to chewy, not crunchy.
- Storing airtight while warm: Steam softens the chickpeas. Let them cool completely and store loosely covered at first.
- Overcooking: They can go from crisp to burnt quickly. Check in the last 5 minutes and shake the pan occasionally.
Alternatives
- Air fryer method: Air fry at 390°F (200°C) for 14–18 minutes, shaking every 5 minutes. Dry first, then toss with oil and spices halfway through.
- Dry spice swaps: Try curry powder, chili-lime seasoning, everything bagel seasoning, za’atar, ranch seasoning, or lemon pepper.
- Fresh herb finish: After roasting, toss with finely chopped parsley or cilantro and a squeeze of lemon for brightness.
- Sweet version: Mix 1 tablespoon brown sugar with 1/2 teaspoon cinnamon and a pinch of salt; toss warm roasted chickpeas with a teaspoon of melted coconut oil and the sugar mix.
- Oil-free option: Skip the oil and season with salt and spices after the pre-dry step. Texture will be slightly drier, but still crisp if baked hot and long enough.
- From-scratch chickpeas: Cooked-from-dry chickpeas work well. Drain, dry thoroughly, and proceed. They often roast even crispier due to firmer skins.
FAQ
Why aren’t my chickpeas staying crispy?
Let them cool completely before storing, and avoid fully airtight containers on day one. Moisture is the culprit, so dry them well before baking and use a hot oven.
Re-crisp briefly in the oven if they soften.
Do I need to peel the chickpeas?
No. Removing loose skins can help with texture, but it’s optional. A good dry-off and hot bake matter far more than peeling every chickpea.
Can I use dried chickpeas instead of canned?
Yes.
Cook dried chickpeas until just tender, not mushy. Drain well, dry thoroughly, and follow the same roasting steps. They often turn out extra crunchy.
How do I keep the seasoning from falling off?
Season after the initial dry bake, when the chickpeas are warm and lightly oiled.
The oil helps spices cling. If needed, add a tiny extra drizzle of oil and toss again.
What’s the best oil for roasting?
Olive oil adds great flavor and works well at 425°F. Avocado oil is another solid choice.
Use a light amount—too much oil can soften the final texture.
Are roasted chickpeas good for meal prep?
Absolutely. Make a batch on Sunday and keep them at room temperature. Use them to top salads, grain bowls, or yogurt dips throughout the week.
Can I make them less salty?
Yes.
Start with half the salt, taste after roasting, and add more if needed. Acidic finishes like lemon juice or a sprinkle of sumac can boost flavor without extra salt.
What can I serve them with?
They’re great with hummus, tzatziki, or a simple yogurt dip. Toss them on roasted veggies, soups like tomato or butternut squash, or leafy salads for crunch.
Wrapping Up
Crispy roasted chickpeas are simple, fast, and endlessly versatile.
With a hot oven and a good drying step, you’ll get a snack that stays crunchy and tastes bold. Keep a jar on the counter for quick munching, or use them to add texture to meals all week. Once you dial in your favorite spice blend, this will be a regular in your kitchen.